

How I Installed a Scotts Steering Stabilizer on my 2005 R1200GS using a shadow-line.co.za mount kit.
Disclaimer: This is how I installed MY damper on MY bike. I am not saying this is the only way, or even the right way, to do it. Since a steering damper effects the steering on your motorcycle, improper installation can result in VERY BAD things happening. Use this guide at your own risk.
Also, I may not be using the “correct” terminology for some of the bikes’ parts. Look at the pictures and I’m confident you’ll be able to figure out what I’m referring to.
LESSONS LEARNED:
- Order your parts from Scotts as soon as you get the shipment tracking information from Shadow-Line. You’ll end up with everything in your mailbox at about the same time.
- If you don’t use bar risers, cut the post mount at the cut ring BEFORE you attach the post mount to the bike like it says in Gavin’s instructions!
- A standard Scotts post pin fits the damper arm better than the supplied post pin.
______________________________________________________________________________________
I found an older Scotts steering damper sitting in a box in the garage, and decided I’d like to try it on my R1200GS. After much research on the interweb, I found contact information for Gavin at shadow-line.co.za ([email protected]). I emailed him and purchased one of his mount kits. Payment was sort of a pain because he cannot do PayPal. My bank charged me $35.00 to complete a wire transfer of funds - which sucked. Anyway, the mount kit arrived via USPS less than a week after the wire transfer was complete. Tracking information was provided by Gavin, and the ZA tracking website was excellent.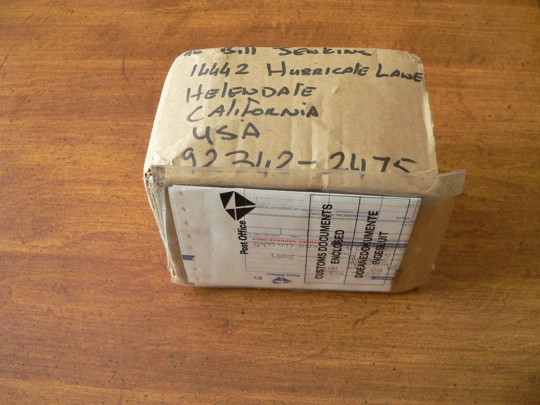
Inside the box is a plastic pack with all the mount bits along with written instructions.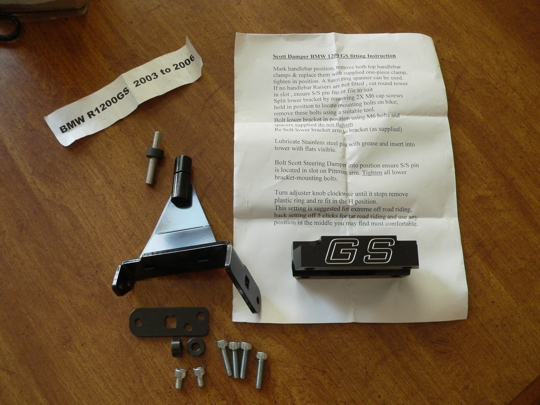
Before you do anything else, you need to figure out if you have an “old” or “new” style damper. Around 2006 Scotts changed the design of the damper case. The old style case has a 2.5mm lip on the bottom, like mine. The new style case is perfectly flat on the bottom.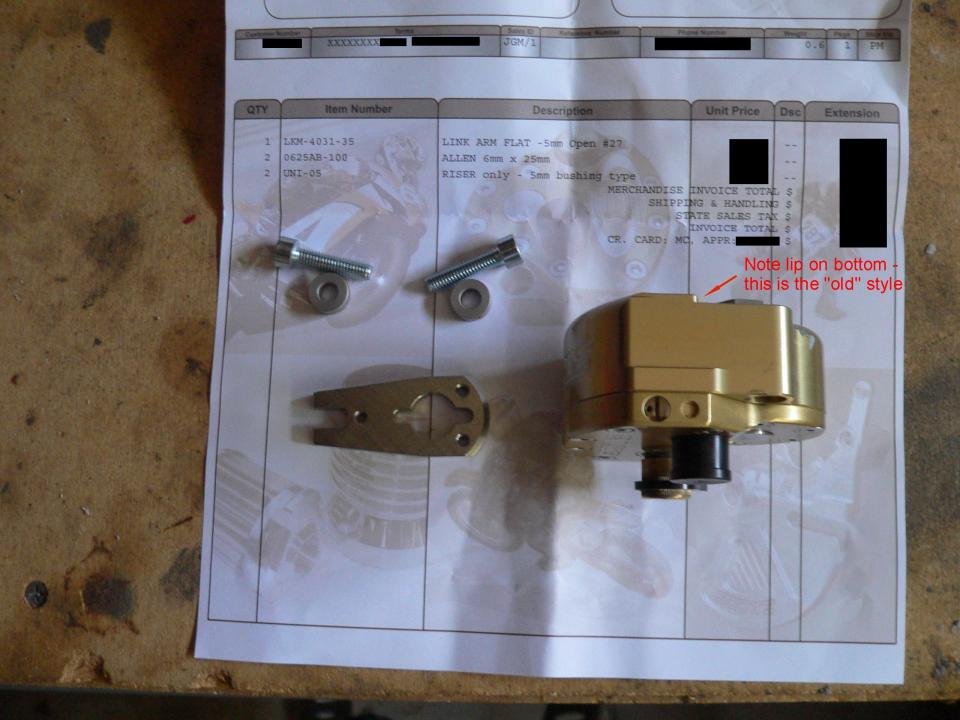
If you have an old style damper, call Scotts Performance (818) 248-6747 and order the following parts:
Quantity Item Number Description
1 LKM-4031-35 Link Arm Flat – 5mm Open #27
2 0625AB-100 Allen 6mm x 25mm
2 UNI-05 5mm bushing type
If you have the new style, flat bottom damper – you do not need the two UNI-05 bushings.
I found the written instructions a little confusing (I like pictures better) but figured it out once I had all the bits near the bike. One of the cool features of this mount system is that you don’t have to remove the fuel tank from the bike to install the post mount! The left side mount arm is separate from the post bracket, so you slide the bracket in from the right side of the bike, then secure the left arm to the bracket once everything is in place.
Here is a top down view of the parts put together off the bike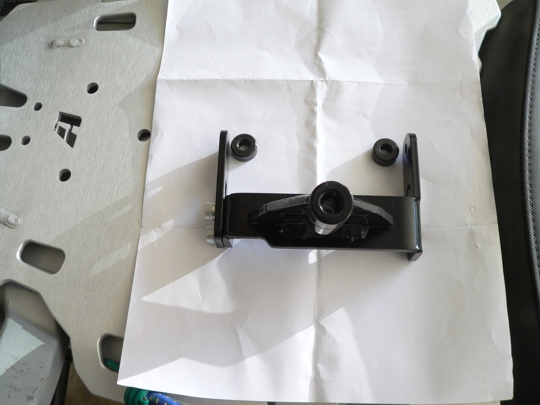
Notice that the spacers go on the inside of the mount arms and the two short allen-head bolts are used to secure the left mount arm to the post bracket. The two longer allen-heads will replace the torx screws on either side of the steering stem (more on that later).
The first thing we need to do is mount the replacement handlebar top clamp which will allow us to affix the damper to the bike. Using a sharpie, make an index mark on your handle bars so you can easily get them back to your preferred position.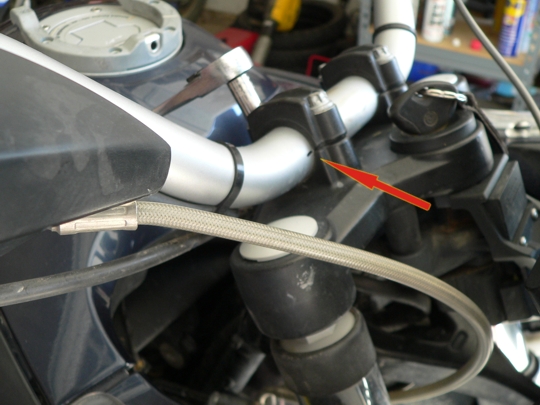
Next, remove the four bar clamp bolts. If you don’t have the proper torx socket, an 8mm will work - if you’re careful. Remove the bolts and the stock bar clamp. Clean off any crap that has accumulated on/around the handlebars or the bar seats. While you’ve got the bar clamp bolts out, slop some anti-seize on them. You’ll thank yourself at some point in the future.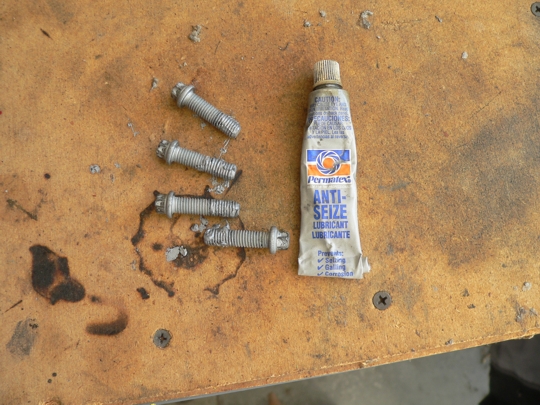
Next place your new bar clamp on the handlebars - with the half-circle cutout facing the rear of the bike.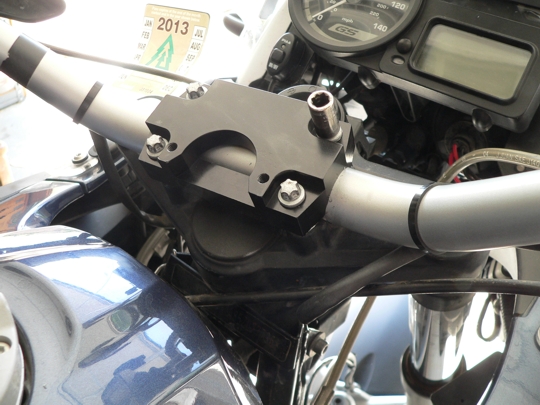
Reinstall your freshly anti-seized clamp bolts. Snug them down in a cross pattern paying particular attention to your index mark to ensure proper bar angle. Before you tighten things down, check to be sure there is an equal amount of air space between the bar clamp and the bar seats - both fore and aft. Torque the bar clamp bolts to 6 ft lbs (BMW spec) or pretty darn snug, like I do. Have a drink and pet your dog, you’re 1/3 done!
Next we need to install the post bracket. Start by locating the two torx screws on either side of the steering stem; they are on bosses located down and forward from the VIN plate.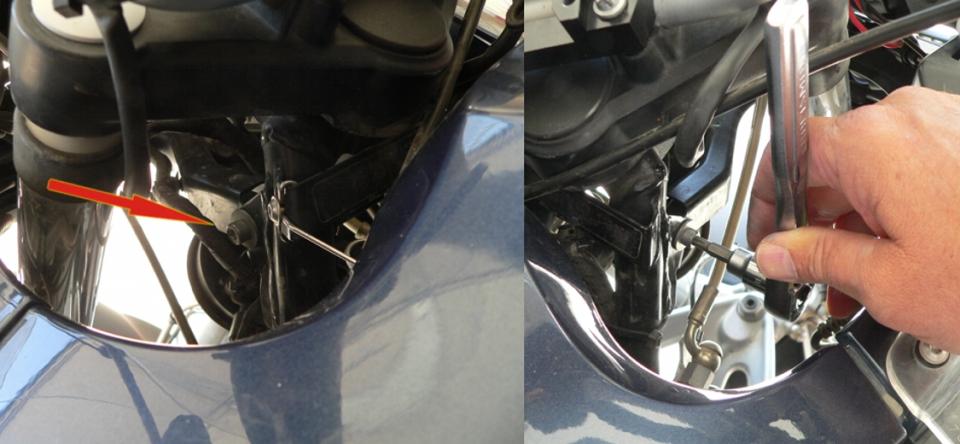
Remove the torx screw from the right steering stem boss. Place a long allen head bolt through the right post mount bracket arm, then slide one of the spacers on the end of the bolt. Now slide the post bracket, with bolt and spacer, between the tank and the triple clamp from right to left. Since the remaining bolts are all steel to steel, I didn’t use any more anti-seize compound. Get the bolt well started, but do not tighten it yet.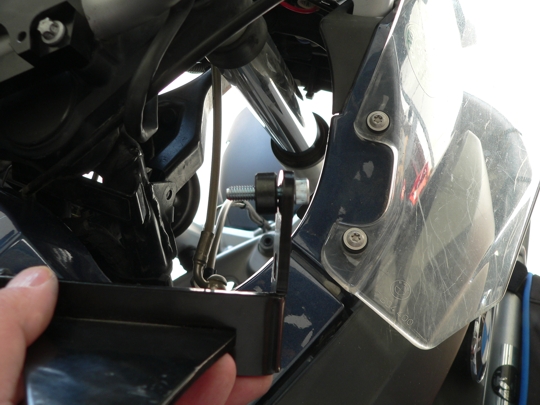
Once you have the post bracket in place, remove the left side torx screw. Place the left side mounting arm in position (don’t forget the spacer) and get the left side allen head bolt started into the steering stem boss. Once you’re sure it’s not going to cross-thread, insert the two short allen head bolts that secure the left mount arm to the post mount bracket.
Swing the left mount arm up into position and secure it to the mount post bracket with two short allen head bolts. I used blue thread locker on these two bolts.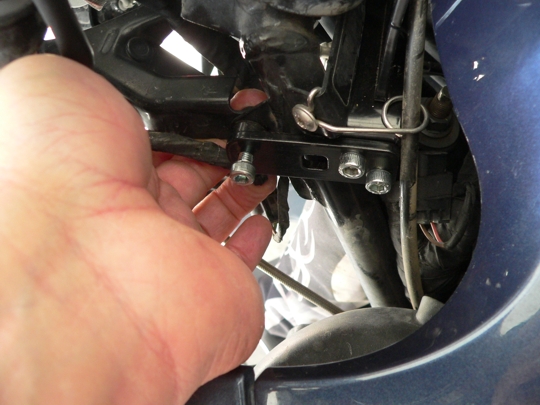
Now you can tighten everything down. The BMW torque value for the torx screws is 30 ft lbs. I couldn’t get my torque wrench in there with an allen tip attached, so I just cranked on it hard with an allen key. Get another drink and kiss your significant other. You’re 2/3’s done.
Here’s where I figured out that I screwed up (see Lessons Learned above). As you can see, there’s no way the post pin can be inserted into the post mount with the damper installed in the bar clamp. I should have cut the post mount before I put the whole thing on the bike JUST LIKE IT SAYS IN GAVIN’S WRITTEN INSTRUCTIONS!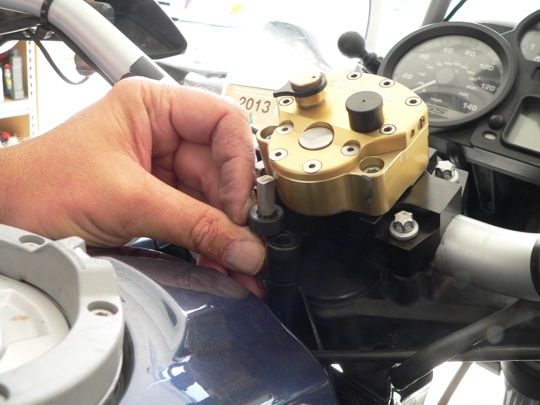
Since I was already pissed at myself, and being a basically lazy SOB; I got out my trusty reciprocating saw, loaded a fresh metal cutting blade, and cut the post mount in place.
After dressing the cut with a flat file, the result wasn’t too bad. I covered the area with a shop rag and sprayed the cut area with some satin black Rust-Oleum®. It looked factory to me.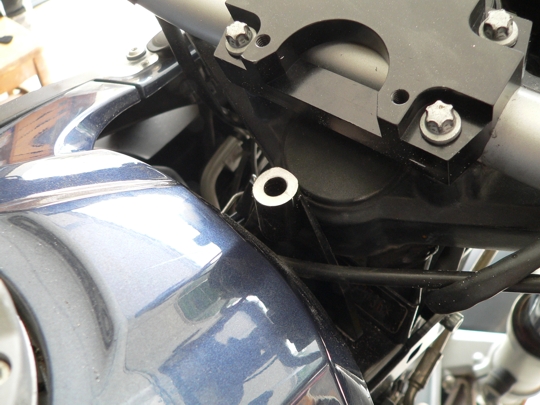
The last step is mounting the damper on the top clamp and adjusting the damper arm post.
- Install the new link arm on your damper.
- Move the collar on the damper pin away from the cut-away section so that the top of the pin will be a fair bit above the damper arm once everything is installed.
- Put a good coating of grease on the bottom end (not the cut-away section) of the damper pin and drop it into damper pin mount hole.
- Using the two allen screws you bought from Scotts, and the two 5mm spacers (if required), mount the damper; being sure that the pin is riding in the damper arm slot.
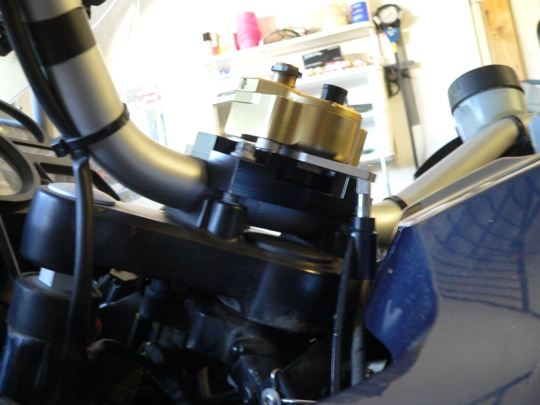
Snug those damper mount bolts down pretty tight. I’ve had them back loose on my XR650R. Use something light to tap the pin down until it’s just above flush with the damper arm at its’ highest point. You can reduce the angle between the damper pin and arm by pulling back slightly on the post mount.
________________________________________________________________________________________
And there you have it; one way to mount a Scotts Steering Stabilizer on a R1200GS using a Shadow-Line mount kit.


Recommended Comments
Join the conversation
You can post now and register later. If you have an account, sign in now to post with your account.