Leaderboard


Popular Content
Showing content with the highest reputation on 01/17/2016 in all areas
-
Simple steps to replace your engine air filter on the R1200GS Adventure LC 1. Remove the four screws holding these two wind deflectors. This is actually optional, I just found it easier to remove the air box lid with these off. 2. Open the small storage compartment on top of the fuel tank. Remove the two screws shown below. 3. Take the seats off and remove these two screws. 4. In front of the fuel tank remove these three screws. 5. Now that all the hardware is removed on the center plastic cowl your able to remove it. The easiest way I found is to grab the front and rear portion with both hands and pull up. You see and hear the circle around the fuel fill area pop free. 6. Remove the fuel vent tube. This is also optional, but I found it easier to pull the air box lid off. 7. Remove the four screws holding the air box lid down. Actually remove the screws from the lid, they are long and make it difficult to navigate the cover off when they're in the way. 8. After the lid is removed you'll need to remove the air filter retainer. After all of this you'll have access to the filter. Repeat steps in reverse once A/F is replaced.3 points
-
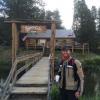
(I cheated and copied this from my profile page) Hello! My name is David, and I'm originally a Michigan resident (if my user name didn't give it away). About 10 years ago though I joined the Air Force and that has moved me all over the place. I'm 33 years old and I've been riding since the age of 6 or 7. I started out on ATVs, then when I started working at a dealership my friends told me that the cool kids can't ride those, and they got me on a dirt bike. I was hooked. I worked at the dealer for about 7-8 years before joining the military, and even since joining I've worked part time at a few shops, and most recently became a MSF Ridercoach and I instruct at a local college. As much as I love motorcycles, I love the motorcycling community and pretty much all aspects of the sport. I've owned (way too many) about 25 different motorcycles ranging from CRF50's, to 250 & 450cc motocross bikes, a KTM 560SMR, Ducati Monster and Hyperstrada, a beautiful Aprilia RSV1000 Mille, BMW R1200GSA, and the most current rides....my KTM 1190 Adventure R and my wives and mine matching Honda Grom MSX125s. I currently live in Maryland, and as many motorcyclist as there are around here, I've had a hard time finding folks near my age group who ride in the Adventure genre. Although there seems to be some folks that have this style of bike, not many are keen on off-roading, and being an old dirt biker, the off-pavement stuff feels most at home. I'm sure many can relate to this feeling. So I normally find myself riding solo and I have built my current bike and camping setup accordingly. As far as actual "Adventure riding" trips, since getting into it last year with the GSA, I took two weeks to ride some of the COBDR and out in Moab. Most of my riding is weekend trips out to the George Washington National Forest to enjoy nature and the forest roads/trails out there. Phew...that was long winded. Thanks for reading and ride safe! Dave2 points
-
The new liquid cooled R1200 motors have 2 spark plugs that are recommended for replacement every 12,000 mile interval. This is a very simple service that requires minimal skill and tools. What you need: Torx set, 3/8 ratchet, 3/8 extension socket, 14mm deep socket, zip ties, and work gloves. (Optional but recommended) Torque wrench with either Newton Meters, or Inch pounds. 1. Start by removing your crash bars on each side of the motor. Below is the standard crash bars from BMW. If you don't have them then lucky you 2. Remove the coil pack covers on each side. 3. Remove the connector that goes to each coil pack. Simply lift the tab up on the retainer clip and pull the connector out. 4. What I did next was wrap two zip ties around the head of each coil pack. Made sure it's not putting any pressure on the connector, I slowly pulled the coil pack outward until it popped out. Make sure you use gloves, the zip ties can take skin off once your pulling. 5. Use your 3/8 ratchet, 3/8 extension, and the 14mm deep socket. Remove spark plug. 6. If your using a torque wrench set it to 12Nm or 106 in lb. Place the new spark plug in the socket and tighten it down finger tight first then apply torque. 7. Do the same with the opposite cylinder and put everything back together.1 point
-
Thanks for posting this. Have less than 2,000 miles on my replacement GSA and was wondering what the differences were going to be from my old GS.1 point
-
Welcome, Dave! Those are some great bikes and solid adventure trails!1 point
-
Glad to be of help, Eric. I've had to good fortune to accumulate a lot of knowledge and information over the years. I sometimes make a recommendation as to products. But most of the time I prefer to just present the information I have, note where I'm adding personal opinion, and let the reader come to his/her own conclusion. I have to laugh a little, though, at Raineer Runner's comment above. That is very typical of first-time users. Usually the comment we got was, "WHY THE HELL did I wait so long?" Ride Warm, Raineer Runner. Ride Warm.1 point
-
Eric, as you know I've just ended a career in the motorcycle industry. My last position was as Director of Sales and Marketing for Gerbing's, which is the largest selling brand by a substantial margin. And while you would expect that might bias my perspective, read on and see for yourself. To be blunt, there is no "bad" heated gear. Gerbing's, Warm 'N Safe, First Gear, Venture Heat, Powerelet, et al. Essentially, it's just gear with different construction and features, from which you'll have to choose those which suit your needs best. Basically, all heated gear is "wired." That means either Stainless, Copper or Carbon Fiber wires are routed through the product in "heat panels or heat areas," When electricity is shorted through these circuits, the wires heat. The heat panels are not intended primarily just to heat you directly. If they did, you would only get warm where the heat panels are. Instead, it is intended as an undergarment, fitting a little bit on the snug side, but not tightly. Having a little air between you and the garment is important. The heat panels can't help but heat you directly, but more importantly they heat the air that surrounds you, which then heats you more evenly. This is why it is important to use heated gear as an underlayer, beneath a sealed motorcycle jacket, using the thickness of the heated liner to replace the thickness of the jacket's quilted liner, which should be removed. This way, everything fits "normally." The liner creates the heat and the jacket traps the heat. Motorcycle gear that uses Gore-Tex (Aerostich, Klim, etc) is a little bit less effective at holding in the heat because Gore-Tex breathes slightly, and that allows a little bit of cold outside air into the mixture. Usually you just turn up the controller a bit and it compensates for the slight introduction of colder air. Heating elements are generally where much of the controversy and hoopla exist surrounding heated gear. Stainless, Copper or Carbon Fiber. Which is best? Which provides the best heat? Etc. Etc. My opinion is that it doesn't matter. Heat is heat. Warm is warm. Now, having said that, there are different delivery protocols. Again, IMO, multi-strand stainless wire delivers the quickest heat. A simple .025 gauge wire can have up to 200 strands of stainless in it, each about 1/4th the thickness of a human hair. Since heat emanates from the circumferential surface of the wire, multi-strand wires have more circumferential area than solid wires or wires with fewer/larger strands. Thus, multi-strand heating wires heat you more quickly. Note that carbon fiber wires are also small multi-strand wires, and they also heat quickly. Multi-strand wires also respond more rapidly to input from the controller. So when you drop into an ice-cold valley and turn up the heat, it's more immediate. Stainless multi-strand, and to a slightly lesser extent (based on my personal experience) carbon-fiber multi-strand, deliver heat more quickly. Now, we're talking about 10 seconds vs. 30 seconds for copper wire. So you have to decide for yourself if this is important. The wires themselves vary in thickness. Stainless wires are thinnest. However, some manufacturers run Carbon Fiber wiring without its insulation coating, preferring to wrap it in a folded insulating sheet that sticks to itself, kind of like sticking the wires in a thin plastic taco and sealing the edge. Since the purpose of the insulation is to prevent shorting, as long as the wiring patterns are designed to not let the wire cross over itself, it should be fine. Carbon Fiber is actually less expensive by quite a bit than Stainless wrapped in a Teflon-based insulation coating, so expect to pay less for a Carbon Fiber heated liner (and gloves) all else being equal. By that I mean check the other features. A manufacturer may, or may not, have decided to put the savings into other features in the garment. Again, you have to decide what you want in a garment and which of its features are important to you. Wiring circuits within the jackets are also becoming more standardized. Most heated jacket liners are wired with two circuits. One circuit is for the jacket itself (chest, back and sleeves). While the second circuit bypasses the jacket and goes straight to the glove plugs at the end of the sleeves. This way, when using a dual controller, you have one circuit that controls the heat for your torso, and another circuit that controls the heat to your hands. Since your hands are usually out in the air flow, while your torso at least has a little protection from a short windshield (or on a sport-touring bike or a cruiser, often a larger windshield), being able to set the temperature of your torso and your hands independently means much greater comfort. Be aware that the "glove" circuit is usually where the connection point is for heated pants and socks. Therefore, your torso will be on one circuit and all your appendages will be on the other. Makes sense. Like your hands, your legs and feet are also more likely to be "in the wind" and wanting of a heat setting different than that needed for your upper body. Controllers are interesting. A lot of people think of them as rheostats. They're not. Virtually every controller out there is actually a pulse-width modulator. Typically with a PWM controller, the duty cycle is usually about one second. During that second, the controller is set to send power to the wires for a percentage of that second, and then shut itself off for the remainder of that second. So at 50% power, the controller would send power through for half a second and be off for half a second. At 20% power, it would be on for .2 seconds and off for .8 seconds. I think you get the picture. And this happens for every tick of the clock. The duty cycle repeats. I've always been a strong proponent of dual controllers for the reasons in the paragraph above. Having that dual-zone control is just so much easier to be comfortable. More recently, wireless controllers have come onto the market. But wireless isn't completely wireless. The signal from the controller to a receiver in the jacket is wireless, but the power from the motorcycle's electrical system must still be connected to you and the jacket by means of a wire. The advantages of a wireless controller is that there's just one power wire to connect/disconnect as opposed to two circuit wires (from a dual controller to a dual-circuit jacket), and that the wireless feature lets you place the controller pretty much anywhere on your motorcycle. With a wired controller, you need to have the controller attached to your outer jacket, or to something that's close to you when you're in the riding position, such as a tankbag. With a wireless controller, you can position it near the left handgrip for easy access, on your touring bike's dashboard, or anywhere you find it convenient. Amp draw. This is the amount of load that the heated garments pull out of your electrical system. They are rated at full power, such that if I tell you that a Jacket Liner has an amp draw of 70 watts, that's on High. At 50% power, it's on a 50% duty cycle, so the load draw averages 70W x .5 = 35W. At 20% power it would be 70W x .2 = 14W. At 80% power, 70W x .8 = 56W. You need to know the amp draw of your jacket liner, gloves and any other heated garment you're going to be wearing. And also that of any passenger. Then you need to make sure that your motorcycle's alternator can handle the load. A good rule of thumb is to reduce your bike's maximum alternator output by 20% when calculating, just to provide yourself a cushion. Alternators don't make full power all the time. They make more power at more engine rpm, usually up to about 2000 - 2500rpm, by which time they're making full power. So, if you're riding around town at lower rpm, or you have a torquey cruiser that spends some time below max alternator output, reducing the max output by 20% when making calculations gives you a safe cushion. With most BMW's, alternator output is not a problem. Most of the boxers have at least 700W. But what about bikes with lower outputs? Let's take a look at a hypothetical bike with a 400W alternator. First, you have to figure out what it takes to run the motorcycle. For a carbureted bike, figuring ignition system, headlight, taillight, brake light and the occasional turn signal, about 190-200W is about right. For a fuel-injected bike, about 260-275W is about right. Now come the accessories. Got driving lights? About 55W each, or 110W. Very often less if they're HID or LED. Heated grips? 20W (on High). Heated seat? 40W (on High). These are general estimates. So, on a cold day, your fuel-injected bike, with a 400-W alternator (factored down to 320 just to be safe), has about 45-60W to play with. Heated jacket at 50% draws about 35W. Gloves at 50% draw about 15W. You're probably safe. But don't turn on your accessory driving lights, or your draw will exceed the alternator's output and you'll slowly drain your battery. On bikes with questionable alternator limits, it's always a good idea to hook a volt meter up to the battery (Datel makes awesome DVM's). If the battery voltage starts to decline, you can tell and may have to turn some things down, or off, until the voltage builds again. I have this on my V-strom 650. Driving lights plus heated liner, gloves and socks, and I am past my limit. The voltage drains from 14.4V to about 12.5 in 45 minutes. So I have to shut off the extra lights (actually, I added an Eastern Beaver headlight switch and am able to turn off one of the two headlights, saving 55W and barely "balancing" the input/output). Each rider and bike will be different, so you just have to do some basic math and then keep an eye on things the first couple of times you're out in the cold. If it works, you should be OK for the winter. But be careful. Nothing worse than stopping to go to the bathroom and coming out to a bike without enough battery power left to turn over the engine. The bike will still run, IF you can get it started. And in the cold, that's no fun. Anyway, that's a basic summary of things to look for and consider when buying heated gear. As for me, when I'm on my Beemer, I've got all the heat I need. When on the Wee-strom, I'm usually good, but if it's really cold I have to turn off one headlight in order to turn up the heat. As for what I wear, naturally it's Gerbing since when I retired I had a full set of gear and two extra jacket liners and gloves. So I'm set. But I've tested and can recommend just about every major brand. They all keep you warm. It's just a matter of personal preference. However, when it comes to a controller, I do run my gear through a Warm 'n Safe wireless controller for its small size and convenience. But I carry a wired dual controller as a backup just in case. Haven't needed it in 3 years. Hope this helps.1 point
This leaderboard is set to Los Angeles/GMT-07:00