Jump to content

Articles

Know a little something about maintenance, fixing, tuning, or modifying adventure dual sport motorcycles? Or, maybe you have mad skills riding or racing them? Whatever the case, if you have valuable knowledge & experiences that relates to adventure dual sport motorcycles, please help your fellow riders by sharing your best tips, tricks, and how to articles.
    Stefan Bajanora
    BAJANORA is the first Adventure Raid that crosses Baja California and Sonora deserts on the mainland in 10 riding days. We mix the remarkable Baja California peninsula with the extraordinary land of Sonora in one unforgettable trip. 
    “RIDE OF A LIFE TIME”
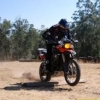
    This is a NON COMPETITIVE event created for any typ of enduro motorcycles. ADV´s are welcome too! Ride your motorcycle for what it´s made for! If you are looking for a unique experience, challenging navigation and pure adrenaline in the desert, you might be all right at BAJANORA.

    Our Staff is specialized in professional off road riding in México. The team around the organizer Stefan Rosner is managing rally events and tours in Europe with many years of experience.  
    2020 EDITION
    A special opportunity to ride on the most beautiful and famous trails in Baja California from Mexicali to La Paz. After a rest day in La Paz, the Baja ferry takes you across the Golf from Baja California to Sonora during the beautiful night on the ocean. In the following days you will discover the amazing views of the deserts and breathtaking landscapes of Sonora.
    10 DAYS RIDE: Demanding trails in remote deserts, magical beaches and a real Mexican “way of life” lets you escape from daily routine. The raid will be guided with GPS waypoints and tracks. 
    In the ADVENTURE CLASS the tracks are around 280 – 350km long and contains 50% of off road riding. In the ROAD RUNNER CLASS you can follow a tour guide on the road.
    YOUR OWN SUPPORT TEAM or MALLE MOTO
    You have two options to enter in the event.
    1.) CHECK IN with your own support team and service crew and bring everything you need during the event by your own.
    2.) CHECK IN as MALLE MOTO and use the staff service truck for your equipment. Everything you bring with you needs to fit in one transport box(For more information click the link) You only need to come by your own with your motorcycle and we´ll carry your luggage in our service truck from one stage to another. We stay overnight in fantastic hotels.


    Bearded-vstromrider
    CRE race track experience!
    Time, 05:15 h. My alarm clock rings and it’s time for me to get my breakfast in my stomach, take a shower and jump on my bike! The 1,5 hour drive to the TT race track in Assen took me to the TT junior track and the CRT Holland training ground for the CRE track training. Here I met with 37 fellow Suzuki riders. Greeting us where the men and women from Suzuki Motors Holland who set up this training day.
     
    Briefing
    Before we could start melting our tyres and scratching our footpegs on the asphalt. We needed to get a safety briefing. This CRE safety briefing included the meaning of the different flags that signal what you need to do on the track in case of any changes. Also they told us not to stop to help someone who crashes. This felt kind of unnatural to me but it made perfect sense. Better to have one person on the ground then a whole pile up on the track.
    After being set to the proper mindset, CRE gave us our rider number. 60 blue was my sign. They put us in 4 different groups coded by colour, for the training on the Junior Track. This part of the day was there to make us proficient in cornering. It also made us explore the capabilities of the bike.
     
    TT junior track
    The junior track is a way smaller but way more corner intense track than the actual TT track. The track consists of a South and North loop. These loops are riddled with corners and turns which will make you flinch at first glance. The CRE instructors take you round and around the South and North loops. Turning the flinching into smiling! In total you’ll ride 8 stretches of 10 minute rounds.
     
    CRE instruction proves it’s worth!
    Photo by: wegraceinfo.nl After about 5 minutes the CRE instructor gets off and you have to find your own perfect lines and curve entries. This really makes you think about the cornering, throttle and braking. And this makes you better! I personally went from 0.659 degrees decline to scratching my footpegs around the corners in about 2 rounds. So this means you still have 6 rounds of 10 minutes to train your new skills. The CRE instructor gives you personal feedback on your riding style and this makes for a good ride all day long!
    He told me, that if I wanted to keep some pegs to stand on, I should lean into the curve more with my body. He told me to sit on the side of my saddle. If I felt like Rossi or Marquez, I should even lean in more. But! Never exceed your comfort zone to much he said. The CRE instructor motto: “Push the envelope, but keep it fun and real”.
     
    The Big Track
    After nice lunch, we enter the afternoon CRE programme. This included a little bit of theory about the TT Assen Race Track, and another safety briefing. Directly after that we were sent down to pick up our transponders and let them get mounted on your bikes. These transponders send back your laptime but also monitor your Decibel output. Legally on the TT you are only allowed to ride with an exhaust that emits a maximum of 101Db. If you exceed this they will flag you with a black flag and end your trip with a heat-seeking missile.
    Before we could enter the track we needed to split up again in groups. At the Parc Fermé we arranged these groups and we were the first ones to ride! I followed my CRE instructor onto the track and started slamming my V-strom into the track curves.
    Photo by: wegraceinfo.nl But sadly, as good as my high seated, broad handlebar and manoeuvrable Strom handled on the Junior track. It wasn’t powerful enough to reach any real speed on the track. I thought this would get boring then… But man was I wrong. Fun all over! Finding the ideal line of entry, exiting curves full power and ramming through chicanes at 90 km/h. Awesome!
    Strubben
    At the TT race track I found my Nemesis. The curve called Strubben. The first few tries it bit me hard. I couldn’t get the right angle, speed and driveline to get through it. But with some coaching from the CRE instructor and my fellow riders, I was able to get it done! I can’t imagine how they do this with speed exceeding 100-200km…..
     
    Verdict: Satisfaction
    It was a very long and very intense day. My legs hurt, knees ached and my back is blown. But it was all so satisfying. I’ve learned to trust my bike that much more now and above all.. I trust myself more. I for one, am now a lot more confident on my bike. Both me and my Strom can do so much more than I thought.
    I can recommend a CRE or CRT training to anyone. No matter what bike you ride. You don’t have to be fast or take the corners the best. You just have to be the best you can be on your own bike.
      Video of V-strom on Race Track.


    Grabowski

    By Grabowski, in Articles,

    Trip Report - Riding Bolivia
    (Editorial note:  Some text that follows was lifted from the published itinerary so attribution in advance to Phil Freeman (MotoQuest) and Cory Rowden (BoliviaMotors))
     
    In early 2016 Phil Freeman at Motoquest invited a bunch of known riders on a scouting trip to Boliva in partnership with Cory Rowden of BoliviaMotors.  Scouting trips are where a tour group has drafted a route and itinerary but hasn’t yet ridden the whole thing and wants to understand what a scheduled trip might be like in that area.  Known “Plan-B” riders are invited to fill out the trip and manage the costs.  Plan-B riders are all like “Well  we have a flat tire, we’ve just ridden through a forest fire, and we’re lost – so let’s do Plan-b!”
     
    On a serious note, everyone on a scouting trip needs to be relaxed, self-reliant, and ready for any change in plans.  On that note, let’s begin.  What follows are my notes and observations, mixed in with the written itinerary provided by Motoquest/BoliviaMotors, so editorial attribution should also go to Phil Freeman and Cory Rowden.  We were going to be riding Suzuki DR650s (with electric start) and BMW 800GSs.  I know this is an XLADV forum but this story is about the route rather than the bikes and anything we rode was doable on a large KTM or BMW, unless notes.
     
    Getting the Bolivian Visa ahead of time involved sending my US Passport to the local consulate with the fee, a self-addressed return envelope, and a lot of patience.  I’m told that tourist Visas are available upon arrival if you have the $160 cash in clean, crisp, undamaged US notes – some of the other riders who flew into Santa Maria did it that way.  I flew from California into La Paz on Friday a couple days ahead of time to acclimate to the altitude.  La Paz is the highest international airport in the world at 13,000 ft.
     
    www.motoquest.com
    www.boliviamotors.com
     
    I coordinated to meet a riding buddy of mine in La Paz, Craig from Missouri, and we tooled around the city for a couple days with some local FIFA contacts he had.
     
    https://en.wikipedia.org/wiki/El_Alto_International_Airport
     
    On Sunday we flew from La Paz into Cochabamba and met the rest of the riders, guides, and mechanics.
    Day 1 – Sunday, November 6th, 2016
    Arrival in the city of Cochabamba - https://en.wikipedia.org/wiki/Cochabamba
     
    Phil picked us up in a very classy Hawaiian shirt from the airport and we met all the other riders and mechanics as they arrived at the hotel.  Before dinner we also took cabs over to the BoliviaMotors compound, checked out the bikes, and went for a quick ride through the city and up to some spectacular viewpoints.


    Plan-B:  One flat and one drop for the group.
    Day 2 – Monday, November 7th, 2016
    Cochabamba – Comarapa (160 miles)
     
    https://en.wikipedia.org/wiki/Comarapa
     

    Day 3 – Tuesday, November 8th, 2016
    Comarapa – La Higuera (105 miles)
     
    Lunch at Valle Grande.  This is where the Che Guevara route starts and we visited the hospital laundry where his body was laid out to show the world he was truly dead.  We also visited the location where his secret burial site  was and the new mausoleum built to honor Che and his comrades killed by the Bolivian Army in 1967.


    Spent a rainy night in the tiny village of La Higuera. This is where Ernesto ‘Che’ Guevara was held and later assassinated.   
     
     
    https://en.wikipedia.org/wiki/La_Higuera
     
    This is the location of the actual schoolhouse where he was held and executed.  We dined and slept at the telegraph compound where Che’ supposedly sent his last telegrams, allowing the Bolivian Army to pinpoint his location for eventual capture.
     
    Placed my Mosko Moto 40L duffle here for a pic.  This bag, a gift form my amazing wife, was indispensible for lugging gear through airports and up narrow stairs at 14,000 ft altitude.  Just pull on the shoulder straps and walk – never taking a standard roller-bag again.
     
    http://mosko-moto.myshopify.com/products/backcountry-40-rear-duffle
     
    Day 4 – Wednesday, November 9th, 2016
    La Higuera – Sucre (180 miles)
     
    Pretty amazing riding day on a road described by adventure riders as “one of the best adventure riding roads in the world”.
     
    Rode pretty good paved roads into Sucre – a UNESCO World Heritage Site. Altitude 9,000 ft.
     
    https://en.wikipedia.org/wiki/Sucre

     
    Day 5 – Thursday, November 10th, 2016
    We spent the day in Sucre and visited the oldest silver mine in the Americas, as well as the government museum.  A great day to rest and relax.

    Day 6 – Friday, November 11th, 2016
    Sucre – Potosi (100 miles)
     
    Wonderful paved roads into Potosi. Some of the group went and toured a working silver mines of Cerro Rico and they all regretted the experience of crawling, climbing, scrambling up and down sketchy underground pathways and being in the mine when dynamite was used further down.  I don’t have pics of this but I’ll try to find some.
     
    Day 7 – 9  November 12th through 14th, 2016 (My timeline is a bit hazy here)
    Potosi – Uyuni – Oruro (Hundreds and hundreds of miles)
     
    So Uyuni was indeed a highight.  This is on the Dakkar route and the Solar de Uyuni salt flats is one of the wonders of the world.   We rode out onto the 4,000 square miles of ancient salt lake to some islsnds for lunch, then back for a dinner and overnight at a hotel made of salt.  Must be seen to be believed.


    What follows was a combination of dirt roads, some awesome ascents, valleys, dry riverbed crossings, and finally a nice highway into the city of Oruro, which is considered to be Bolivia’s most indigenous city.
    Day 10 – Tuesday, November 15th, 2016
    Oruro – Quime (105 miles)
     
    So now we ride up and over the Andes form the western alto-plano region east intot he Amazonian areas over a summit of 15680 ft.


    Day 11 – Wednesday, November 16th, 2016
    Quime – Chulumani (100 + miles)
     
    A long and hot dirt slog day.   After descending into the Amazon rainforest on winding, narrow dirt roads into the lowlands of Bolivia. This was a very long day up and over mountains, through valleys, dodging slash and burn agriculture that got out of hand, trying to pass trucks on silty dusty mountain roads, and then up and over the next mountain.  And then the next one.  Many flats and breakdowns (electrical) today but the Bolivian chase truck caught up to everyone of us.
     
    The video is a little glimpse of the exhaustion, heat, and elevation.  We stayed overnight in Chulumani.


    Day 12 – Thursday, November 17th, 2016
    Chulumani – Coroico (60 + miles)
     
    More upper reaches of the Amazon rainforest riding a little used dirt road between the two Yungas towns of Chulumani and Coroico.   Lots of coca leaf cultivation.
    Day 13 – Friday, November 18th, 2016
    Coroico – La Paz  (40 epic miles)
    Road of Death in the rain and fog.  Video should give a little insight into this spectacular day.  A couple breakdowns today (chain sprocket on Angry-Ian’s bike, and a non-injury low-side in the rain by Happy-Ian) and very cold, but awesome and one of those life experiences that you'll remember for the rest of your life.
     

    So an epic trip and I probably didn’t do it justice here because I’m not a writer, but if you have any questions let me know and I’ll try to fill in the rough spots.
     
    Gregory Grabowski
    R1200GSA


    Bryan Bosch
    Paper and mesh filters take a fundamentally different approach to filtering. Mesh filters filter down to a certain size, and for practical purposes, no smaller than that. They do, however, only require a single pass to filter to that level. They work by simply having a very strictly controlled mesh size, through which a spherical object larger than that size cannot pass. They are rated in "absolute" terms, as with the Scotts (35μm "absolute"). This rating tells you that nothing larger than 35μm (35 microns) will pass through it. (1 micron, or micrometer more correctly, is 1/1,000,000 of a meter, or 0.001 mm, or 0.000039")
     
    Mesh filters are able to achieve this level of filtration with remarkably low resistance to fluid flow as well, which in the case of the Scotts means that the bypass valve will not open on cold starts, and there will be no appreciable pressure loss across the filter.


    Scotts Performance Stainless Steel Oil Filter


    "Paper" filters are different. They can stop even finer debris than mesh filters, but they also allow some larger debris to pass. They filter somewhat the same way a thick shrub catches objects thrown into it. Most tennis balls get stuck, but not all. An occasional golf ball gets caught, but an occasional soccer ball passes through to balance that out.


    HiFlo Filtro Paper Oil Filter


    The random arrangement and density of the fibers in the element create odd and irregular gaps through which debris can pass. This creates little crotches of sorts that enable the filter to catch extremely small debris, but also creates gaps that allow it to pass ridiculously large material at other times. The paper element media is also three dimensional to a degree, whereas mesh is essentially two dimensional; if something passes through one opening in the mesh, it's through, which isn't necessarily the case with fiber media.
     
     
    Fiber, or paper, filters can stop debris as fine as 20 microns, or even less. But, they won't stop it all on the first pass. Worse yet, they won't stop all of the debris even as large as 90 microns or more on the first pass, and some particles occasionally come free of the filter to re-enter the oil stream. They are considered multi-pass filters, which carries the expectation that the same debris will pass through the system multiple times before being intercepted. They will be given "Beta" ratings like "80/25", which tells you that it will stop 80% of all 25 micron particles on the first pass. However, they will rarely publish the fact that they may very well also test at 85/35 or 85/40, and certainly will not mention that they tested at only 95/60 (95% of 60 micron debris).
     
    Additionally, paper filters resist oil flow, particularly when cold, a great deal more than does mesh, and cold starts often cause a paper filter to bypass. In the Scotts filter, a one inch square of the mesh media they use will flow 1.9 gallons of cold 90 weight gear oil per minute at only 1 psi pump pressure (70 degrees F). My Yamaha YZ450 oil filter contains about 15 sq/in of mesh, which means that the media itself has the ability to flow over 28 GPM of cold 90 weight at 1 psi. The pump at the corner gas station is less than half that fast on a good day. That figure is also far beyond the delivery capabilities of the engine oil pump in any case. That basically means that unless you run half a shop rag through your engine, the Scotts filter will never bypass under any conceivable circumstance, and will filter at full capacity regardless of temperature. This is often not the case with "paper" filters, which commonly open the bypass valve during warmup operation.
     
     
    So, it isn't a black and white, indisputable, one's better than the other kind of choice, but in my opinion, the 35 micron stainless mesh is the way to go, and Scotts makes the best example of that type of filter. Let me also point out that there is a huge difference between the medical grade stainless steel mesh used in Scotts filters and the OEM brass screen filters used motorcycles like Yamaha YZF's up until '03. The brass filters will filter no finer than 70-80 microns absolute, which is not nearly acceptable, IMO.
     

    What do you think? That's been your experience? Let us know in the the comment section below.
    Bryan Bosch
    Having a clutch that works correctly is key to being able transfer all the power your engine produces to the rear wheel (or wheels if you're a quad guy/gal). In this post I want to share some key clutch inspection techniques I use and recommend to help ensure your clutch works as it should. These tips are presented in a step by step format and are taken right from my book, The Four Stroke Dirt Bike Engine Building Handbook.
     
    Basket Inspection
    Inspect the driven gear which is secured to the basket. Look for damaged gear teeth and other imperfections. Grasp the gear and basket firmly, then try to twist the gear. The gear is secured to the basket either with rivets or fasteners. With use, the rivets or fasteners can loosen causing the gear to become loose. Most baskets use round rubber dampers to locate the gear to the basket, which are sandwiched behind the backing plate. The dampers can wear out and break, which will create excessive play between the gear and basket. Any looseness may have been accompanied by excessive gear noise or rattling sounds when the engine was previously running.


    On baskets with loose gears and riveted backing plates the corrective action which will need to be taken is to either replace the basket or drill the rivets out. The idle gear may need to be pressed off in order to remove the backing plate. Once this is done, holes can be tapped and bolts installed which will secure the gear in place. Any rubber dampers that have worn can be replaced with aftermarket options. Check out this article for more details on clutch basket damper replacement: How to repair your clutch basket dampers for less than $30.
     
    Inspect the needle bearing bore surface on the basket next. Run your fingernail across the bore feeling for signs of wear. The bearing surface should be smooth and free of imperfections. If the surface is grooved or worn the basket will need to be replaced.


    Inspect the area inside the basket where the large thrust washer resides. Wear should be minimal in this area. If any grooving is present, the needle bearing and spacer the basket rides on may have worn causing the basket to wobble or the pressed in steel insert has backed out, ultimately causing the face of the basket to rub on the edges of the washer.


    Check for bent clutch basket fingers on the basket. Then look for grooving on the basket fingers where the clutch discs come in contact with the fingers. Grooving is caused by the clutch discs slamming into the clutch basket fingers. Normally grooving will be more pronounced on the drive side fingers. Grooving is not abnormal and occurs through usage of the clutch.
     
    If any grooving is present, use the end of a pick to evaluate how deep the grooves are. Any grooving that can catch the end of the pick is also likely to be able to catch the edge of the clutch discs. When this happens, the clutch will have difficulty engaging and disengaging. If your bike had clutch disengagement/engagement problems prior to disassembly, basket grooving is the most probable cause.


    A file can be used to smooth the grooves so the discs no longer catch, however deep grooving is an indication that the basket is near the end of its life. When filing clutch basket fingers, attempt to remove as little material as possible and remove material evenly from all the fingers.
     
    Some manufacturers provide a specification for the clearance between the clutch disc tang and the basket fingers. This clearance can be measured by temporarily installing a clutch disc into the basket and using a set of lash gauges to check the clearance between the two parts. Both the clutch disc tangs and basket fingers will wear so if the clearance is outside the service limit it may be possible to prolong the life of the basket by installing new clutch discs. This is a short term fix however, and replacing both components at once is advisable.


    Bearing/Spacer Inspection
    Inspect the clutch hub needle bearing and spacer for signs of wear. The needle bearing will be replaced with a new bearing, but if the spacer is in good condition it will be reused. Check for grooving or concavity along the surface of the spacer where the bearing rotates. While the needle bearing won’t be reused, it can be inspected as well to help confirm any problems associated with the clutch basket or spacer.


    Hub Inspection
    There are two main areas on the clutch hub which will wear. First, grooving can occur on the splines which locate the clutch plates to the hub. The grooves are a result of normal clutch use and occur when the steel clutch plates rotate back and forth in the spline grooves. Any grooving which catches the end of a pick should be considered problematic. Careful filing to smooth the grooves or hub replacement are the two options available for remedying the issue. The clutch plates must be able to easily slide back and forth along the hub, otherwise clutch disengagement/engagement problems will occur.


    The second area susceptible to wear on the clutch hub is at the back face of the hub. This is where the outer clutch disc contacts the hub. When the clutch is engaged, the clutch disc and hub will rotate in unison. However, when the clutch is partially engaged or disengaged, the clutch disc will rub against the face of the hub causing both the hub and disc to wear. Look for uneven wear patterns and indications of how deep the clutch disc has worn into the clutch hub.


    If the face of the clutch hub has worn excessively or unevenly, the hub should be replaced.
     
    Pressure Plate Inspection
    The interaction between the pressure plate and clutch disc is identical to the situation previously described between the clutch disc and clutch hub. Wear will occur on the face of the pressure plate which contacts the outside clutch disc. Determine the condition of the pressure plate by looking for signs of excessive or uneven wear on the face of the pressure plate.


    Disc and Plate Inspection
    Both the clutch discs and clutch plates are designed to be wear items which will need replacement from time to time. Thickness and straightness are the primary inspection criteria used to determine if either component requires replacement. If there are any problems with any of the discs or plates replacing them as a set is best.
     
    Clutch Disc and Clutch Plate Inspection
    Clutch discs are made out of various compositions of fibrous materials which wear at different rates, while clutch plates are made from steel. Service manuals will specify a minimum thickness that the clutch discs and plates can be. This thickness can easily be measured by using a caliper. Take measurements at three to four locations around the clutch disc or plate to confirm either has not worn unevenly.


    Once all the disc and plate thicknesses have been measured, both should be inspected for warpage. This can be done by laying the disc or plate on a surface plate or other flat surface. A set of lash gauges are used to determine any warpage. The service manual should specify a maximum warpage value which is usually around 0.006” (0.15mm). Attempt to insert the 0.006” lash gauge underneath the clutch disc or plate at multiple points. If the feeler gauge slides beneath either of the parts, those parts are warped and should be replaced.


    Clutch discs which have been overheated due to excessive clutch fanning by the rider, not only may warp, but also emit an unpleasant stinky burnt smell. If a noticeable smell is present, the discs have overheated and should be replaced. Likewise, clutch plates that have overheated will likely be warped and exhibit discoloration. The discoloration is a sign of excessive heat build up. Once the clutch plates have overheated, the material properties of the plate change, the hardness is reduced, and the plate becomes less wear resistant. This means discolored plates should be replaced.
     
    Lastly, inspect the clutch disc tangs for wear, chipping, or damage. If any tangs are damaged the disc should be replaced.
     
    Clutch Spring Inspection
    Over time and due to normal clutch use, the clutch springs will shorten. Clutch spring minimum free length specifications are provided by manufactures and can easily be measured using a caliper.


    Clutch springs that are shorter than the minimum spec provided by the manufacturer will not have sufficient spring pressure to keep the clutch from slipping under heavy loads. Any springs at or past their service limits require the replacement of all springs as a set. This way when the new springs are installed, even pressure is applied to the pressure plate.
     
    I hope you enjoyed this passage from my book detailing clutch inspection. If you have additional tips you'd like to share please leave a comment!
     
    If you want more technical DIY dirt bike engine information, learn more about the book on our website or on Amazon. Simply follow the links below!
     
    The Four Stroke Dirt Bike Engine Building Handbook
     
    Amazon Store


    Thanks for reading!
     
    -Paul Olesen, DIYMotoFix.com
    Eric Hall
    I have always loved learning about new things (auto-didactic) and for a long time I was trying to think of one of the most neglected pieces of riding gear that we think is completely undifferentiated and then find something new about that topic. I think I have found a new topic with socks for adventure riding.
     
    The only thing I know about socks is that when I did the IDBDR last year probably the one thing that smelled the worst was my socks! I figured maybe the best way was just to buy a pack of them at a Wal-Mart or something, wear them for a day and then throw them away. I also have noticed that I tend to get leg cramps in my tent at night as well as find that sometimes my lower legs itch like crazy after a ride. So maybe there could be something to a sock made specifically for motorcycle riders?
     
    I did reach out to KLiM ($10-$96) for this article but got no response. I did, however, get the chance to speak with Moto-Skiveez' Shawn Lupcho and he gave me the 411 on their Compression Riding Sock with Aloe ($24.95; sizes S, L, XL). I have not tried these socks myself yet and Moto-Skiveez is not paying for this article in any way but I am motivated to go buy a pair myself now. I had also heard of Ugly Socks but found they support groups who shut down riding areas.
     
    Compression Riding Sock from Moto-Skiveez (image from ADVPulse's Rob Dabney)

     
    Rev'It's Socks Tour Summer

     
    The first pair of motorcycle-specific socks I got was RevIt's Socks Tour Summer ($39.99). They are positioned as helping deal better with heat and moisture but since they don't address odor and cost so much, I was reluctant to go back down that road. I found they lose their soft feel pretty quickly too and are really hard to pull onto your feet unless your skin is bone-dry.
     
    Icon Raiden's sock

     
    I've also worn these from Icon Raiden ($30) as well as SOKz ($20).
     
    Sokz

     
    These Compression Riding Socks from Moto-Skiveez have three main points of differentiation: compression, feel & odor control
     
    Compression
     
    Shawn (Moto-Skiveez) found a particular study from the UK while researching problems motorcyclists have with their legs that indicates a higher incidence of venous lower leg issues among motorcyclists than the general population. Their sock provides a low amount compression to help deal with that swelling (edema). The itching and cramps I experience are also related to lower limb venous issues associated with riding that compression can address.
     
    Feel
     
    Many compression socks out there work to reduce swelling but are poorly tolerated by the wearer because they are too tight and made from synthetic materials that don't feel very good on the skin. These socks are made with 40% natural Aloe Vera fiber that has a very good feel (better feel & wicking than cotton) that will address chafing.
     
    Odor Control
     
    This Aloe Vera fiber also serves an anti-microbial and anti-odor function. Aloe Vera fiber is also found in gauzes and bandages for this reason.
     
    Rider Testimonials
     
    I first heard of these socks from Dennis Godwin (GS Trophy '16) and he raves about them. He even let me sniff his socks after wearing them all day (yes, I went there) and to my surprise they did not stink. Rob Dabney of ADVPulse was challenged to wear one of these socks on one leg and another sock on the other leg and judge for himself... he decided the one from Moto-Skiveez was much better. Dusty Wessels reported he wore these socks while on a ride with RawHyde for three days straight and even though they got soaking wet, they didn't stink.
     
    Conclusion
     
    So I hope we've all learned something here? There are solutions out there for various lower leg issues like swelling, cramps, itching as well as odor. I thought a sock was just a sock but figured out there are a number of reasons you may want to pass on that 8-pack of tube socks the next time you're in the Wal-Marts.
     
    I will be sure to report back once I get myself a pair of these and can do a more complete product review. If you do have experience with these socks or any other gear, feel free to leave us your review so other riders can learn from your experience.
    Eric Hall
    Why Instagram?
     
    So you want to use Instagram as an adventure rider? Great idea! Instagram isn't as big as Facebook but the demographics aren't as old, it's growing very rapidly (Facebook has plateaued) and most importantly the engagement rate is as much as 58 times higher than Facebook. We've been using Instagram for just over a year now and have reached the 41,000 mark (as of this writing) so we must be doing something right (we don't claim to be experts though). I haven't verified this 100% yet but we appear to be #1 on Instagram in the ADV space. There are a few gear manufacturers like Alpinestars and such with more followers than us but we are more media/community. We're much larger than ADVPulse Adventure Bike Rider and ADVMoto magazines combined.
     
    However, how you use Instagram will be very different than how we use it. About 20% of our content is original and 80% is reposted. "Anyone can copy and paste" you might say but we only share images of those who tag us. If someone gives us a shout out then I'm going to return the favor if it's a good image. That's community right there. I'm also looking for elements you'll learn more about further down like composition and a story or quote to accompany the image. There's another account that does nothing but share images; it seems the most popular images he can find, but he's a third smaller than us with twice as many posts it took to get there. We passed them a long time ago. We also try to direct traffic to this online forum and I'll periodically talk about an article, review or interesting how-to piece. I also use Instagram to give shouts out to the sponsors of our project bike.
     
    If you have a personal account already that's fine but consider setting up an adv-specific one if you plan on using it extensively and perhaps to attract new or reinforce current sponsors. Instagram has made it easy now to toggle back and forth between multiple accounts in their app.
     
    Hashtags
     
    Hashtags? Sure, but don't go overboard. Here are some category type ones : #xladv (of course!) #advrider #dualsport. Many companies have their own hashtags they promote and try to own, like #nodirtnoglory (ADV Addicts), #makelifearide and #rideandshare (BMW Motorrad), #readytorace (KTM) or #sizematters (XLADV). Hashtags help your photos get found by others.
     
    The most common hashtags I've used/reposted: advrider, bmwmotorrad, adventure, dualsport, motorcycle, adv, enduro, makelifearide, ktm, advaddicts, moto, bmw, offroad, advlife, travel, dualsportlife, r1200gs, touratech, rideandshare, motorrad, wanderlust, bmwgs, sizematters, nodirtnoglory, motolife, etc...
     
    Some hashtags bug me. #whyweride I don't like because that documentary film never featured any adventure motorcyclists yet they use us to market their film by sharing photos of us and in many cases do NOT attribute credit. They've been caught many times and still do it after photographers have told them they may not use their photos. I'm also growing a bit tired of BMW's #makelifearide and #rideandshare because they aren't readily associated with solely BMW (like #unstoppable) and I think they kind of take credit for the popularity of its use when it's by riders who have no idea it's BMW's. However they are a good way to get noticed by that company if that is your goal. I regularly search for the latest #xladv hashtags to see which photos I want to re-post.
     
    Some still baffle me like #rideandwander. That's an actual account but it's kind of taken on a life of it's own and people use I guess because they like it. Just remember not to over do it.
     
    Feature your sponsored gear
     
    If you have some gear that's been sponsored then give that manufacturer/vendor a shout out with a tag so it will be easier for them to find it and be found by others. Many times I have searched for a tag hoping to find a photo/story of someone using that product. Make it a point to photograph or video the sponsored item so people can see it up close and see how it's used.
     
    Text Field
     
    Your post ideally should have the first 155 characters be text (because that's what's seen in feeds). Have something to say! Instead of "rode some trails today," tell a story or give an inspirational quote. Pikipiki_overland_blog does a great job of storytelling and Sjiriki_Jess does really well with the quotes. Chickamotorunner and FeralCat2Wheels are also doing a great job with the stories recently.
     
    Try to engage your followers (remember Instagram is 58 times more engaging than Facebook). Ask a question. But also monitor your responses. Instagram doesn't do a good job of making it easy to track so be sure to look at past photos you've posted to answer any questions, delete offensive comments or report spam posts. Tools like Iconosquare can help you there.
     
    Put your hashtags after the text or consider even posting your hashtags in the first comment after you've posted the photo. That keeps it cleaner but you risk losing those hashtags when someone re-posts your photo. You can put a short link in but they don't work well. It's best to say "see link in profile" and put a link there that you want people to click on.
     
    XLADV Content: Photos
     
    This photos is our most liked at XLADV. It's received over 7,000 likes!


    For content, I'd say what works best is pretty simple: photos of your bike! (insert photo that has gotten the most likes on xladv) Look at the like counts for our account and you'll quickly start to see a pattern. People want to see a bike either just sitting there looking awesome or doing something awesome like on the ground, in the air or on a bridge or narrow path. Put yourself in there too but let's see your face and see you smile/laugh. Landscape photos might look good on a big screen but without a bike in it, they're useless. Don't forget most are viewing on their smartphones. Photos are posted in Instagram's own square format so give some thought to how you frame your photos. You can add a filter effect but not a lot of people use that anymore. You can also put up a grid of multiple photos. MichelDelCourt does photos very well. It helps to start as a good photographer but it's not hard to simply look at popular adventure riders to see how they are composing their photos. Think about the elements they choose like a road, bridge, rut, mud puddle, etc... Think about the time of day for their photos; most likely in the morning or evening when you have the best light and not mid-day. You may also want to consider watermarking your photos with a logo of some kind given how many like to "borrow" them. I use iWatermark for that.
     
    XLADV Content: Video


    Video works well too, especially video with music. Instagram recently extended the limit of video from 15 seconds to 1 minute. But try to avoid the boring helmet cam footage of you riding down some highway; it's just not that interesting. I think the one post of ours with the most views (about 65K) is the one of KatePeckMe lifting up her R1200 GS Adventure at a training camp. It helps to be a thin beautiful model too! When you post a video you can choose the initial image so do that instead of putting up a video that has a black image. Why would anyone click on that?
     
    Which XLADV accounts to follow?
     
    Find a few accounts you like and then go through who they follow. You can click on "follow" right there. If you'd like to get someone's attention, consider tagging them in a photo (different from using a hashtag) but don't do it too much because it can get annoying. It's best not to message someone asking them to repost your photo. Just use their tags for awhile as well as like and comment on their posts and if they don't follow you/repost your stuff, move on.
     
    Easier to work with those who want to
     
    Chances are you will find "Instagram buddies" where you may like and repost each others' stuff. If someone reposts your photo then thank them and then share one of theirs. You will find a lot of new friends that way and it will matter less if that one account you are after isn't following you. I use the Repost app and have seen the Regram app but that seems to be available only outside the US. XLADV is a unique type of account that uses Repost a lot but you may not ever use it yourself. When you have such great content like Great_World_Trek then you don't have to bother
     
    Don't even think of buying followers. That's just cheezy and pointless. There are however a few tools out there that can kind of assist you in gaining likes and followers in a pseudo-organic way. I tried Instagress for a few days and could see how that can help someone looking to gain followers. What it does is you program it to automatically like and/or comment on photos with certain hashtags, certain accounts, etc... Those people think you're actually following them so be sure you're on top of it should they respond to your comment. It can be easy to spot when you see someone commenting with the same thumbs up icon on accounts they're not even following. We already gain a few hundred followers a day so it wasn't something I really needed to do after the three day trial but I know a handful of accounts who've used it to great success. One went from a few hundred followers to over 10,000 in two months! Organic is best though.
     
    Make sure your Instagram account is listed on your website/blog (if you have one) and/or your other social media channels so people can find you.
     
    Seeking Sponsors
     
    So you've become an expert in adventure motorcycle use of Instagram and have a huge following! Congratulations! That's an end unto itself but it's also handy if your aim to to seek sponsorship. If I'm a gear manufacturer then I know I need to sponsor riders to get the word out about my product. I'm going to have a budget and will want to choose riders who already have a solid presence on Instagram (and FB, YouTube, etc...). I'd want someone who takes good photos, tells a story and has a following. Your strong following will help you command better sponsorship agreements and perhaps even cash on top of free product. Consider that product that retails for $400 may only cost them $200 or less and you're essentially going to give them free exposure indefinitely?
     
    Stay tuned for more articles like this. I'll be covering How to Facebook, Google+, etc... in the near future. How to gain sponsors and negotiate contracts is something I'll be presenting at Horizons Unlimited Yosemite this fall.
    Eric Hall
    You've probably seen similes of motorcycles to women but how about tires to beer? I make this observation in an upcoming article in ADVMoto magazine on our #xladvproject990 when talking about the new VRM 401 tire from Vee Rubber that, similar to the craft beer renaissance in the American beer industry, it seems there's also a budding "craft tire" movement underway.
     
    Just as our choices in beer used to be limited to the mainstream of beers like Coors, Miller and Budweiser, our choices in tires used to be mostly from the big three: Michelin, Continental and perhaps Pirelli. Just as beer drinkers used to care more about what the bottle looked like and who was going to see them drinking it than the product inside, riders are now finding some pretty amazing innovation and features they find they prefer to what everyone else is doing.
     
    Take a look at three new tires I've seen come to market that I think fit this new "craft tire" definition:
     
    Vee Rubber's VRM 401


    This is what I'd call a "Samuel Adams Boston Lager" of a tire. I've had the opportunity to test two sets of these tires on the #xladvproject990 bike and I was extremely impressed. It seems to me they took a look at the venerable TKC-80 and thought "how can we make this better?" The off road traction and clean out is even better I think due to the greater block spacing but one can also see a "faceting" of alternating rows of blocks I think as a way to mitigate road noise. The pavement grip is still on par with the TKC-80. Initial mileage reported was below that of the TKC-80 but a little bird has told me they probably, just as Kenda did with their Big Block, are hardening up the compound to be at parity. The rubber they're using is 100% natural and straight from the largest rubber producing country: Thailand (not pronounced "thigh-land" like Alan from "The Hangover"). I'd call it a 60/40 (dirt/street) tire like the TKC-80.
     
    Motoz's Tractionator Adventure

     
    Here's some video


    This tire I'd liken to a bold and hoppy West Coast double IPA like Stone's Ruination. I got a glimpse of these at the KTM Adventure Rally last year in Crested Butte, CO and when I posted a photo online, it went viral! It's review here has gotten more views than any other. They just look super chunky don't they? These too are made from 100% natural rubber from Thailand (even though Motoz is an Aussie company; pronounced "Mote-Oz"). This natural rubber gives better longevity as well as grip even when worn down. The secret though is that they just give you more tread to begin with; 15mm on the rear lugs. This is more a 70/30 (dirt/street) tire so try not to complain too much about the front tire's behavior in the first 100 miles or so.  
    GoldenTyre's GT 201 and GT 723


    Let's call the GT 201 an 805 Lager. A high quality, robust and long-lived alternative to perhaps the K60 or even the E07. XLADV's digitallysane reviewed this tire here.
     
    I really can't say it better than Lyndon Poskitt:


    GT 723


    And let's call the GT 723 a Sierra Nevada Pale Ale. Less refined but still high quality and tough.
     
    Again here's Lyndon Poskitt's
    :
     
    So what do you think? Let your big bike riding friends know your thoughts by writing a review of your favorite tire in our review section. Putting it on Facebook is fine for a day or two but here it will last and be objectively compared to other tires.
    Eric Hall
    Motorcycle Tire Pump Comparo: The Top 7 Pumps for Your XLADV Motorcycle
     
    Portable air compressors have come a long way and now there are quite a few that are purpose-built just for us motorcyclists. Some have even been purpose-built for XLADV motorcycles as you're about to see. Thankfully we have a plethora of products to choose from and I'd say perhaps too many given some out there are obvious ripoffs of earlier innovators' designs. I've left those pumps out on purpose so if you see it here, you'll know you're likely to get an original and be supporting real XLADV motorcycle riders.
     
    I did learn quite a bit from some of the makers of these pumps so let me give you the 411:
    Yes most components are made in China but they've come a long way and are the best you'll find. Many are still assembled here in the US and are American small businesses you can trust. Most any pump will have heat issues. They're great for your own bike but most require a cool down period before you start to inflate a second tire. Most any pump is going to trip BMW's canbus system and will require a hard wiring to the battery for best results. They start fine but will trip once the pump is under load. A lot of the lower priced pumps work great but have shown poor reliability and are prone to breaking if dropped on a hard surface. All these pumps should be kept out of the dirt. A best practice is to hang off a peg or place on a mat or case the pump comes in. All will inflate your tire to about 40 psi in about 6-9 minutes.


    I can't really say which is the best pump out there; that's something you're going to have to figure out for yourself. But, I did think it would be fun to break these pumps down into sub-segments for a few well known ADV archetypes: The Starbucks Rider, The Hardcore ADV-Enduro Rider, and The Budget Conscious Rider.
     
    The Starbucks Rider


    You strike quite the figure in that genuine whale foreskin suit and that $30k top of the line behemoth XXLADV bike as you sip your latte and give knowing winks and finger-guns at your local coffee shop. Okay, so that's a bit over the top. Just a bit of fun! This type of rider really doesn't mind what a pump costs; they just want the best and will go with what they saw someone else have in their aluminum box style panniers.


    CyclePump from BestRest Products - $115.00
     
    The CyclePump seems to be a popular pump ("30,000+ sold") and at $115 it's the most expensive in this comparison. I had a first generation version of this pump and did not have a good experience with it. But to their credit, they've continuously improved their product with a new chuck design, new housing mounts, subtle improvements in the compressor, and now rubber armored end caps. Despite the high price point, this pump does not come with a light or pressure gauge and is the heaviest and largest pump (XXLADV) in this comparison.
     

    (photo by Noah Horak; used w/permission)
     
    The Hardcore ADV Enduro Rider
     
    This rider is going purely on function and will spend a dollar if it means they're ensured of reliability when it counts. They don't care about plastic housing or maybe lights or gauges; they just need something that's purpose-built and going to work when they need it to.


    ADV Designs Micro Tire Pump - $79.99
     
    The Micro Tire Pump is the product that started it all for ADV Designs. They set out to build the best motorcycle pump and tested many of the cheaper pumps finding that 50% of them failed! They found the best compressor motor available (used by a few others as well) and went for a function over form approach. Sure, it may look like it's from the former Soviet bloc but it's very popular and works well. They also won Overland's editor's choice for best value back in '08 and comes with a 1 year warranty.


    Motopumps Mini Pro Inflator - $69.99
     
    Motopumps is another product created by a motorcyclist frustrated by three flats in 6 weeks costing him $380 in towing! He saw there weren't any good motorcycle pumps out there and set out to make his own; also using the best components: campbell pump; teflon coated pistons; metal gears; high air flow and more efficient (more air/less amp draw). The Mini Pro also comes with a 5 year warranty! They have a new Air Shot pump ($59.95) that is even smaller and lighter.


    The Budget Conscious Rider
     
    This rider is more likely to have a milk crate top box and a homemade camp stove made from an aluminum can. They get the most adventure value out of their dollar not because they are "cheap" but because they derive satisfaction out of seeing what they can accomplish for the absolute lowest amount of money. This rider's pump is going to be very affordable as well as very small and not necessarily have all the bells and whistles.

     
    Stop N Go Mini Air Compressor $36.95
     
    I've seen many of these pumps out there and they seem to get the job done very well. It's made from heat resistant plastic that is claimed to not overheat. What's cool is even at a low end price it still comes with a built-in gauge and led light!

     
    Slime Power Sport - $30.10
     
    This may be the most ubiquitous pump as it seems to be everywhere. Lots of people have it, but it's known to be a bit fragile to dropping and is also known to overheat and require a 20 minute cool down cycle after 9 minutes of use.

     
    Antigravity Micro-Start Tire Inflator - $24.99
     
    I happen to have used this little guy (the smallest and lightest) for two years now with no trouble at all. Like the Stop N Go, it also comes with a built-in gauge and led light. It also works with my Micro-Start XP10 battery as well!


    AirMan Tour - $25.95
     
    The AirMan is another one you tend to see a lot of motorcyclists carry. I like the built in gauge as well as a deflate button.
     
    Decision Time!
     
    So which of these pumps do you think works best for you? If you have experience you want to share we'd love to have you write your own product review here.
     
    Pump Comparo Chart:
     

    Bryan Bosch
    For the record, I'm no safety nazi. In fact, I don't think that powersports junkies in general fit that bill. However, most will agree that it's simply smart to dress for the crash, not the ride. But, do most apply the same logic when dressing for bike repair and maintenance? More specifically, do you take precautions to protect your skin from absorbing the chemicals that you work with?
     
    While we may not feel the affects of chemical absorption immediately like we would the affects from a crash, over time (sometimes sooner), you may be setting yourself up for health issues. The purpose of this article is more to serve as a point of awareness and discussion than anything. At the end of the day, your body, your health, your choice. I contend that simple, inexpensive precautions can spare unnecessary heartache, time, and medical costs.
     
    Skin absorption can quickly transport chemicals both into the skin and ultimately into the body without you even knowing it. For the types of maintenance & repair tasks that riders do, this is likely the most significant avenue of exposure. Some of the chemicals that riders use can potentially result in systemic toxicity if they penetrate through the skin, not only causing skin problems (most common), but other potentially more serious health issues away from the site of entry.
     
    Per the CDC, 90-95% of occupational skin diseases are Contact dermatitis that has symptoms that includes:
    Itching Pain Redness Swelling The formation of small blisters or wheals (itchy, red circles with a white center) on the skin Dry, flaking, scaly skin that may develop cracks


    Much less frequent, but more serious potential problems can include skin cancers and neuropathies (nerve damage), but since there are so many chemical agents out there, their affects on the body are not fully understood by any means. What we do know is that there is absolutely no upside to exposing your skin to the chemicals that riders typically work with.
     
    So, what's the solution? Stop working on your bike? Hell no! Buy the right gloves and the biggest secret... wear them!


    Chemical Resistant Glove Material Guide (
    courtesy of Granger.com)


    I've read people say, "Gloves are too expensive!" I say with record high medical insurance deductibles, are you sure it's cheaper should you end up needing medical care? I'll admit, when I was in my teens and 20s, I was bulletproof and didn't wear chemical resistant gloves. But, a few summers ago, I ended up with a dermatitis from unprotected exposure to a silicone sealant and learned my lesson. It took months for the skin on my hands to finally calm down. I'd have gladly paid the cost of a decades worth of gloves to have avoided!
     
    However, I will concede that there is a legitimate concern at some level of loss of tactile feel that only you can decide how much you're willing to deal with. In some situations, you simply may not be able to complete a specific task with gloves on. However, I don't see this as and all or nothing proposition. You might even consider the thinnest gloves available for more delicate tasks where glove strength isn't a big issue anyway.
     
    We're all going to die of something, but dying is easy! I just don't want to suffer needlessly while I'm here and wearing chemical resistant gloves while wrenching just stacks the deck every so slightly in my favor.
     
    Ok, post your arguments, er, uh, debate points in the comments section below. I'm ok if you call my hands "girly-man hands".
    ConTeacher
    How I Installed a Scotts Steering Stabilizer on my 2005 R1200GS using a shadow-line.co.za mount kit.
     
    Disclaimer: This is how I installed MY damper on MY bike. I am not saying this is the only way, or even the right way, to do it. Since a steering damper effects the steering on your motorcycle, improper installation can result in VERY BAD things happening. Use this guide at your own risk.
    Also, I may not be using the “correct” terminology for some of the bikes’ parts. Look at the pictures and I’m confident you’ll be able to figure out what I’m referring to.
     
    LESSONS LEARNED:
    Order your parts from Scotts as soon as you get the shipment tracking information from Shadow-Line. You’ll end up with everything in your mailbox at about the same time. If you don’t use bar risers, cut the post mount at the cut ring BEFORE you attach the post mount to the bike like it says in Gavin’s instructions! A standard Scotts post pin fits the damper arm better than the supplied post pin.

    ______________________________________________________________________________________
     

    I found an older Scotts steering damper sitting in a box in the garage, and decided I’d like to try it on my R1200GS. After much research on the interweb, I found contact information for Gavin at shadow-line.co.za ([email protected]). I emailed him and purchased one of his mount kits. Payment was sort of a pain because he cannot do PayPal. My bank charged me $35.00 to complete a wire transfer of funds - which sucked. Anyway, the mount kit arrived via USPS less than a week after the wire transfer was complete. Tracking information was provided by Gavin, and the ZA tracking website was excellent.

    Inside the box is a plastic pack with all the mount bits along with written instructions.


    Before you do anything else, you need to figure out if you have an “old” or “new” style damper. Around 2006 Scotts changed the design of the damper case. The old style case has a 2.5mm lip on the bottom, like mine. The new style case is perfectly flat on the bottom.

     
    If you have an old style damper, call Scotts Performance (818) 248-6747 and order the following parts:
    Quantity Item Number Description
    1 LKM-4031-35 Link Arm Flat – 5mm Open #27
    2 0625AB-100 Allen 6mm x 25mm
    2 UNI-05 5mm bushing type
     
    If you have the new style, flat bottom damper – you do not need the two UNI-05 bushings.
    I found the written instructions a little confusing (I like pictures better) but figured it out once I had all the bits near the bike. One of the cool features of this mount system is that you don’t have to remove the fuel tank from the bike to install the post mount! The left side mount arm is separate from the post bracket, so you slide the bracket in from the right side of the bike, then secure the left arm to the bracket once everything is in place.
     
    Here is a top down view of the parts put together off the bike

     
    Notice that the spacers go on the inside of the mount arms and the two short allen-head bolts are used to secure the left mount arm to the post bracket. The two longer allen-heads will replace the torx screws on either side of the steering stem (more on that later).
     
    The first thing we need to do is mount the replacement handlebar top clamp which will allow us to affix the damper to the bike. Using a sharpie, make an index mark on your handle bars so you can easily get them back to your preferred position.

     
    Next, remove the four bar clamp bolts. If you don’t have the proper torx socket, an 8mm will work - if you’re careful. Remove the bolts and the stock bar clamp. Clean off any crap that has accumulated on/around the handlebars or the bar seats. While you’ve got the bar clamp bolts out, slop some anti-seize on them. You’ll thank yourself at some point in the future.

     
    Next place your new bar clamp on the handlebars - with the half-circle cutout facing the rear of the bike.

     
    Reinstall your freshly anti-seized clamp bolts. Snug them down in a cross pattern paying particular attention to your index mark to ensure proper bar angle. Before you tighten things down, check to be sure there is an equal amount of air space between the bar clamp and the bar seats - both fore and aft. Torque the bar clamp bolts to 6 ft lbs (BMW spec) or pretty darn snug, like I do. Have a drink and pet your dog, you’re 1/3 done!
     
    Next we need to install the post bracket. Start by locating the two torx screws on either side of the steering stem; they are on bosses located down and forward from the VIN plate.

     
    Remove the torx screw from the right steering stem boss. Place a long allen head bolt through the right post mount bracket arm, then slide one of the spacers on the end of the bolt. Now slide the post bracket, with bolt and spacer, between the tank and the triple clamp from right to left. Since the remaining bolts are all steel to steel, I didn’t use any more anti-seize compound. Get the bolt well started, but do not tighten it yet.

    Once you have the post bracket in place, remove the left side torx screw. Place the left side mounting arm in position (don’t forget the spacer) and get the left side allen head bolt started into the steering stem boss. Once you’re sure it’s not going to cross-thread, insert the two short allen head bolts that secure the left mount arm to the post mount bracket.

     
    Swing the left mount arm up into position and secure it to the mount post bracket with two short allen head bolts. I used blue thread locker on these two bolts.

     
    Now you can tighten everything down. The BMW torque value for the torx screws is 30 ft lbs. I couldn’t get my torque wrench in there with an allen tip attached, so I just cranked on it hard with an allen key. Get another drink and kiss your significant other. You’re 2/3’s done.
    Here’s where I figured out that I screwed up (see Lessons Learned above). As you can see, there’s no way the post pin can be inserted into the post mount with the damper installed in the bar clamp. I should have cut the post mount before I put the whole thing on the bike JUST LIKE IT SAYS IN GAVIN’S WRITTEN INSTRUCTIONS!

     
    Since I was already pissed at myself, and being a basically lazy SOB; I got out my trusty reciprocating saw, loaded a fresh metal cutting blade, and cut the post mount in place.

     
    After dressing the cut with a flat file, the result wasn’t too bad. I covered the area with a shop rag and sprayed the cut area with some satin black Rust-Oleum®. It looked factory to me.

     
    The last step is mounting the damper on the top clamp and adjusting the damper arm post.
    Install the new link arm on your damper. Move the collar on the damper pin away from the cut-away section so that the top of the pin will be a fair bit above the damper arm once everything is installed. Put a good coating of grease on the bottom end (not the cut-away section) of the damper pin and drop it into damper pin mount hole. Using the two allen screws you bought from Scotts, and the two 5mm spacers (if required), mount the damper; being sure that the pin is riding in the damper arm slot.


    Snug those damper mount bolts down pretty tight. I’ve had them back loose on my XR650R. Use something light to tap the pin down until it’s just above flush with the damper arm at its’ highest point. You can reduce the angle between the damper pin and arm by pulling back slightly on the post mount.
    ________________________________________________________________________________________
     
    And there you have it; one way to mount a Scotts Steering Stabilizer on a R1200GS using a Shadow-Line mount kit.
×
×
  • Create New...