Leaderboard

Popular Content
Showing content with the highest reputation on 01/09/2016 in all areas
-
Welcome, my sons and I plan on doing the IDBDR this summer. We will keep you in mind when we are on our way. We're on S10s as well, you'll enjoy it.1 point
-
BTW Eric, I enjoy your vids on YouTube!1 point
-
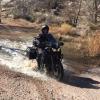
We had a great ride! Here's video of Slab City to Cibola.....less rapping and more riding https://vimeo.com/1512375201 point
-
@huff_318 Las Vegas1 point
-
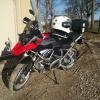
Something that is on Black Dog's website but I do not see it here, is that you have to use it in conjunction with the stock BMW rear rack if you want both, you CANNOT use it together and have a level platform. I verified this with Martha (owner), because I was looking at it as an alternative to Alt Rider, whose price went up almost $50 for their two piece system. If you want a level platform for the GSW, you have to get the "Helopad".1 point
-
Welcome! Boy, big change from Apply Valley to Iowa! I miss the riding out west for sure.1 point
-
1 point
-
2015 ended well for http://MotoReflective.com, as the warm east coast winter kept a lot of people out on the roads. And the short days made having reflective on their bikes even that much more of a priority. But now we're into winter, and that means winter projects. Winter is actually one of our busier times as people look to accessorize their bikes in preparation for the coming riding season. So if you're one of the many who will be adding reflectivity and safety to your ride for 2016, here are some tips for mounting your MotoReflective Kit(s) during these colder months. The most important thing is temperature. Get your saddlebags indoors and let them get to room temp before you prepare them for installation. This is very important as the adhesive on the 3M vinyl material we use sets up best in the 70-90-degree range. It'll stick in all weather, but the initial setting up works best in those temp ranges. Once at room temp, you'll want to wash the surface area of your saddlebag where your reflective is going to be applied. For this, be sure to use hot water. Not only does this help dissolve any dirt on the surface, but also any oils and slippery substances (like the silicones used in some cleaner/waxes). You want your surfaces to be completely clean and dry. So once you've washed those surfaces and thoroughly dried them, clean them again with plain alcohol, dry them well, and it wouldn't hurt to let them air dry a bit as well. Regular drug-store alcohol will finish the job of removing oils and silicones, leaving a very clean surface for mounting your Reflective Kit. The Reflective Kits shown above in this thread are our most popular ones for large Adventure bikes, such as BMW GS's and those bikes using Jesse Odyssey aftermarket luggage (we'll be adding Reflective Kits for Touratch Luggage this spring, so if that's you, stay tuned). Getting the vertical reflective strips on straight can sometimes be just a bit trickier than it seems. And with a perfectly clean surface, once it sticks, it's stuck. So use a strip of masking tape as a guide to make sure you've got things aligned with the vertical lines on your cases. And make sure the masking tape's aligning edge also positions the reflective strip where you want it horizontally. Regular white masking tape, or the blue painter's tape, both work well, but if you have a choice, choose the color that best contrasts with the surface color of your panniers. What's more, masking tape can be removed and reapplied until you're happy with the alignment line. And if you botch it completely, you can peel it off and start over with a new piece. Next, take a good look at your reflective strips. Each strip has three parts. 1. The paper backing that covers and protects the adhesive on the reflective vinyl pieces. 2. The reflective vinyl pieces themselves, and 3. A clear layer of "application tape" on top, which serves to hold the reflective pieces in place and evenly spaced, just like they are when our computerized cutting equipment finishes cutting your reflective kit. Now trim the reflective strips tightly, so that there's very little extra material around the perimeter of each strip. This will help you to align the reflective pieces tightly to the line you've created with the masking tape. This is where the contrast between the masking tape color and your panniers comes into play. It's much easier to line things up when the masking-tape guide you've created has a contrasting and clearly visible edge. Peel the paper backing off the adhesive side of the vinyl, and put the reflective strip right where you want it, tacking down ONLY the edge that's against the masking tape. Keep the rest of the reflective strip pulled away from your saddlebag until you can use a credit card to gently squeegee (or "scrape" might be a better word) the reflective pieces onto the saddlebags. Scrape them a section at a time, going town the full vertical length. Keeping the unstuck reflective pieces at an angle slightly away from the saddlebag, scrape down 1/4th of the width of the strip, then go back and do another 1/4th, then another and finally the last one. This helps reduce your possibility of trapping air bubbles under the vinyl. And don't worry, the Application Tape on top will protect the reflective pieces from getting scratched by the scraping action of your credit card. Finally, once you've got the reflective strip applied, push it down into your bag firmly, using your hand. Thumbs, thumb heels and palms work best. You really want it to adhere strongly. The last step is to remove the top layer of clear application tape. Removing the tape works best if you pull it off the reflective pieces at the sharpest angle possible. In effect, you're going to pull the tape at a 180-degree angle, so that the tape makes an immediate u-turn as it is being pulled off. If you need a visual, imagine pulling the tape off starting at the top of the reflective strip, and pulling STRAIGHT down. Pull the tape slowly so that you can make sure each reflective piece stays stuck to your saddlebags. If a piece starts to pull up, stop and rub it back down very firmly. Then proceed with removing the application tape. Now that you're done, let everything sit in the house for a day or two. The adhesive actually cures a bit during this time, giving you a much better, longer lasting result that'll help provide visibility, conspicuity and added safety for years to come. That's it. Enjoy your "indoor" winter motorcycle project. Follow the tips above, take your time and you'll have a sharp-looking and effective method of keeping drivers off your backside, once the weather warms and you start riding this spring.1 point
This leaderboard is set to Los Angeles/GMT-07:00