Search the Community
Showing results for tags 'Adventure'.
-
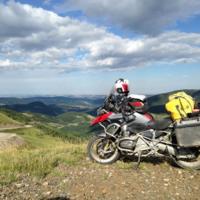
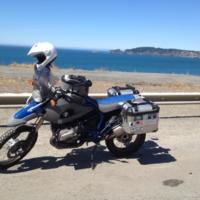
I was going to start the thread with a I've been doing a lot of LDR lately (Long Distance Riding, duh!) and I need more gas crap, but to be honest, I love how the extra fuel canister looks on my bike. The problem I had is that I didn't want to the rotopax to be on the sides or the back but on top of the side aluminum cases. Right under my Wolfman rollie bags. But there was no way to strap them properly so I had to improvise. Total cost of project: $15 Total man hours spent: 1 Total beers consumed: 3 Industrial Revolution Vanilla Porter (I love living in CO) Enjoy! Your standard ADV side case Your standard BMW straps Using the Wolfman rollie alone with the straps: perfect! Using the Wolfman rollie and the rotopax with the straps: disaster! The rotopax will just fly away with the slightest bump. The solution: Footman Loops for next to nothing (here) I also needed some STAINLESS STEEL hardware as well as some pieces of an old bicycle tube Marking the “G” spot Measurements because OCD Am I actually drilling a hole on my sidecar? I wonder if this will void the warranty… The tube will help the water to stay out (in theory) Screw -> hook -> washer -> tube in this order Thank the OCD for measuring… How did I make it crooked? Screw tight (boom, phrasing!) Cut the edges. Final product And here’s the magic! Yes, these are the original straps that came with my bike… This rotopax, won’t go anywhere! Not bad, right? http://i.imgur.com/9yhErV9.jpg Best think, I can still open my side cases with everything on them! Now I’m ready to go to my local Starbucks. Oh wait, I’ve got extra fuel! I can go to the one across town!! WOOHOO!!!! This post has been promoted to an article
- 6 replies
-
- 5
-

-
- WolfmanLuggage
- TouratechUsa
- (and 3 more)
-
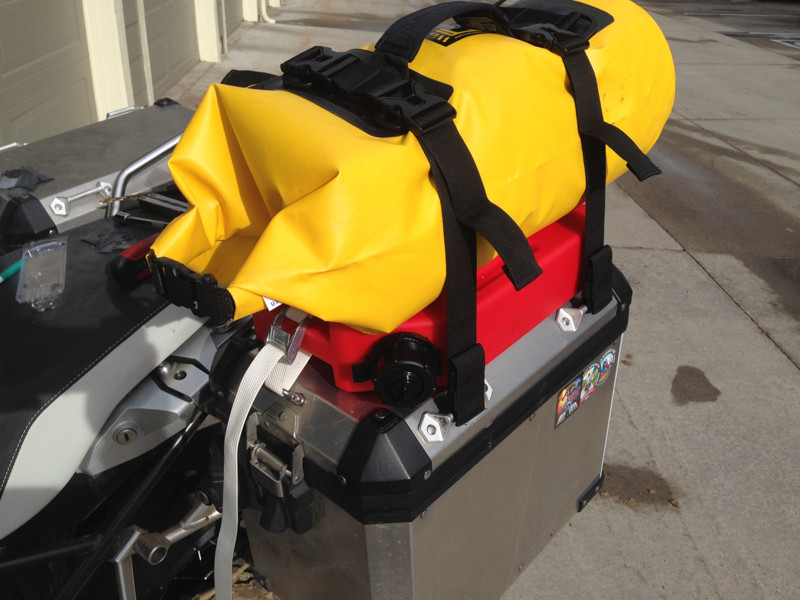 I was going to start the thread with a I've been doing a lot of LDR lately (Long Distance Riding, duh!) and I need more gas crap, but to be honest, I love how the extra fuel canister looks on my bike. The problem I had is that I didn't want to the rotopax to be on the sides or the back but on top of the side aluminum cases. Right under my Wolfman rollie bags. But there was no way to strap them properly so I had to improvise. Total cost of project: $15 Total man hours spent: 1 Total beers consumed: 3 Industrial Revolution Vanilla Porter (I love living in CO) Enjoy! Your standard ADV side case Your standard BMW straps Using the Wolfman rollie alone with the straps: perfect! Using the Wolfman rollie and the rotopax with the straps: disaster! The rotopax will just fly away with the slightest bump. The solution: Footman Loops for next to nothing (here) I also needed some STAINLESS STEEL hardware as well as some pieces of an old bicycle tube Marking the “G” spot Measurements because OCD Am I actually drilling a hole on my sidecar? I wonder if this will void the warranty… The tube will help the water to stay out (in theory) Screw -> hook -> washer -> tube in this order Thank the OCD for measuring… How did I make it crooked? Screw tight (boom, phrasing!) Cut the edges. Final product And here’s the magic! Yes, these are the original straps that came with my bike… This rotopax, won’t go anywhere! Not bad, right? Best thing, I can still open my side cases with everything on them! Now I’m ready to go to my local Starbucks. Oh wait, I’ve got extra fuel! I can go to the one across town!! WOOHOO!!!!
 -

1 comment
Love it! (more coming later) -
0 comments
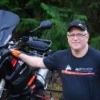
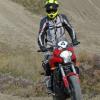
I love my BMW GS Adv. 'Nuff said. Best fun on two wheels since I had a sport bike. If anything my first thought when I bought it, as I rode away from the dealer, was "So THIS is what I'm missing out on."... Life is just different. And now my ZX10r sits in the garage, a proper race queen, having served me reliably for 27,000 miles... My GSA is not only my daily commute but my escape as well. -
This guy is all in! How many of you are willing to sport your bike's brand at this level? I love my Triumph, but this might be a little over the line for me.
-
0 comments
I love this bike... great handling a pure pleasure to ride, I have had no issues to speak of concerning this bike and hopefully will continue on in this manner. Enjoy the challenge of riding it offered and Conrad in the twists fully loaded -
 BORGO PANIGALE (BOLOGNA) ITLAY - February 23, 2015 - (Motor Sports Newswire) - The new Multistrada 1200, presented last November at the World Ducati Premiere 2014, has won over not only the public of EICMA in Milan, but also a celebrated Ducatista: Carlos Checa. The Spaniard, who was World Champion in 2011 among the modified production bikes, riding a Ducati, expressed the desire to ride the new Italian multibike. The opportunity arose when production of the bike began, and Carlos took possession of the first model to come off the production line at the Borgo Panigale factory. Production of the new Ducati Multistrada 1200 has begun; the bike will be available starting from mid-March in Ducati dealerships throughout Europe and starting from mid-April in the US The former Superbike world champion came to Borgo Panigale (Bologna) in person to collect the first bike off the production line The new Multistrada 1200 is available in three versions (Standard, S, and D-Air) with four available accessory packages (Touring, Enduro, Sport, and Urban), and takes the concept of the multibike launched in 2010 to new frontiers “I already had the first version of the Multistrada 1200 and I saw right away that this was my ideal bike. When I saw the new model at EICMA I literally fell in love with it,” said Carlos Checa during his visit to Borgo Panigale. “I realised immediately that the bike had been completely changed and had taken an important step forward in terms of technology, safety and performance. I asked if I could ride it and the moment has come at last. I've already ridden a few kilometres and that's all I needed to notice that the new Testastretta DVT engine is a good step ahead in terms of functioning regularity and performance. The new electronic system, commanded by the inertial platform, has made it possible to introduce a lot of new elements such as ABS Cornering. I also really love the new instrumentation which provides multiple possibilities for connectivity, as well as the new handlebar controls which are more ergonomic and easier to use. For certain I'll be riding a long way with my new Ducati Multistrada 1200”. Carlos Checa and the new Multistrada 1200 were in Courmayeur last weekend, guests at the second appointment with the Winter Tour (the third stop will take place in Ischgl, Austria, 21-22 February, for info wintertour.ducati.com) and they'll soon be taking part in other adventures to come. The new Ducati Multistrada 1200 will be available in the European Ducati dealerships starting from mid-March and in the US starting from mid-April. As soon as it was launched back in 2010, the Multistrada 1200 revolutionised the motorcycling world by offering, for the very first time, nothing less than four bikes in one: from super sport to long-distance tourer, from everyday runabout to enduro. Now, Ducati’s technological expertise has produced a new generation of Multistradas, bikes featuring the latest Ducati Testastretta DVT (Desmodromic Variable Timing) engine and a state-of-the-art technological package that sets a whole new standard in its product segment. The new Multistrada 1200 is the “multibike” par excellence, with cutting-edge technology making it far more than just the 4-bikes-in-1 offered by its Riding Modes. In what is a first for the motorcycle industry, the DVT engine features a variable valve timing system with independent control of both the intake and exhaust camshafts. This optimises engine performance throughout the power range in all riding conditions, thus ensuring maximum power at high rpm, fluid delivery, punchy low-rpm torque and low fuel consumption in full compliance with the latest Euro 4 regulations. The new Multistrada 1200 also sets a new electronics benchmark thanks to the Inertial Measurement Unit (IMU), developed by Bosch technicians, which dynamically measures roll and pitch angles as well as the acceleration on three axis; with this information, the Bosch IMU enhances both performance and safety. For example, the presence of the IMU enables the ABS to include a Cornering system capable of controlling braking even on bends where wheel lock could otherwise cause skidding. On the Multistrada 1200 S it also enables control the Ducati Cornering Lights (DCL) in its full LED headlamp. Moreover, the Bosch IMU has allowed the introduction of Ducati Wheelie Control (DWC): this detects and corrects any front wheel lift to ensure maximum acceleration in complete safety. Like Ducati Traction Control (DTC), DWC features rider-settable 8-level sensitivity. Lastly, the Bosch IMU inertial platform also interacts with the semi-active Ducati Skyhook Suspension (DSS) Evolution (DSS) control system featured on the Multistrada 1200 S.
 -
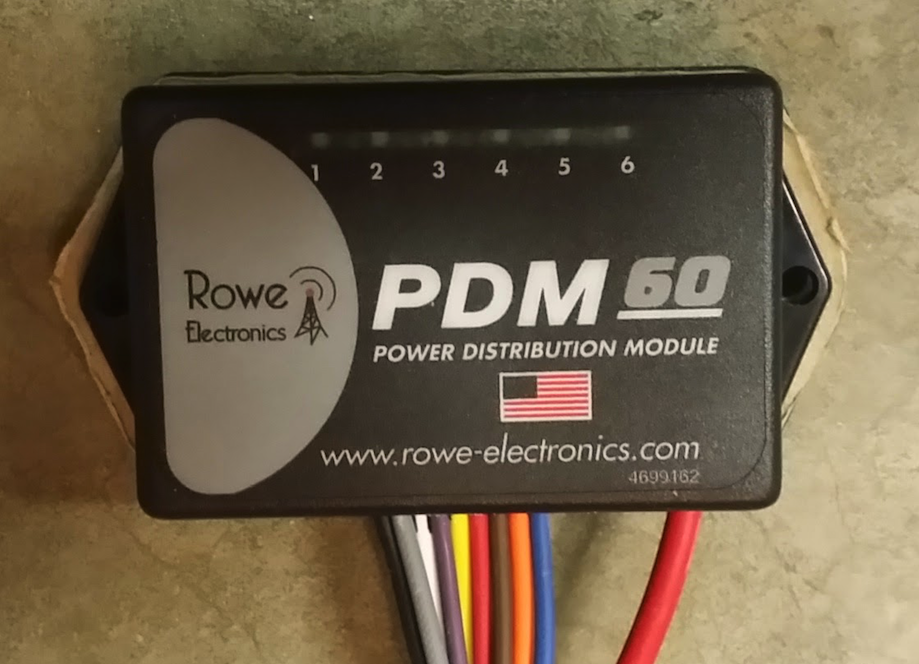 I had blown one of my auxiliary driving lights because I had gotten in the habit of just leaving them on all the time. As soon as I turned the ignition on they turned on, and in turn were subjected to the power fluctuations of engine start since they were wired to an ignition switched source. I needed a solution to prevent this from happening - enter the PDM 60. The PDM 60 gave me the ability to not only eliminate fuses and relays, but create on and off delays for the outputs. Take a look at Rowe Electronic’s PDM 60 programming manual and Quick Start Guide and you can see that there is a lot of flexibility in the delays and circuit trigger options. My only complaint is that the “Delay On” timer, if used, applies to all circuits regardless of the mode selected, and the “Delay Off” timer applies to all circuits selected for delay off - you cannot have a different delay on or off per circuit, so you have to compromise a bit - at least in my case I did. There are other products out there that provide a similar solution, but the PDM 60 seemed to be the least over-done - I like to keep things simple, silly, stupid as much as possible. In this application I was going to use three of the six available outputs. This may give you some ideas on how you want your own setup to function, and get the creative thoughts flowing. Output 1 - Garmin Montana GPS Ignition trigger. 15 second startup delay and 30 seconds shutoff delay limited at 2 amps Output stays on for 30 seconds after ignition off (not engine kill). Garmin products automatically shutoff 30 seconds after external power is lost unless you tell them not to at which point they switch to the internal battery. This gives me time to poke at the GPS after I turn off the bike, or just let it shut off automatically after 60 seconds. Output 2 - Driving Lights Ignition & Ground trigger. 15 second startup delay limited at 4 amps I am using a handlebar mounted switch to provide the ground trigger. This way I can still turn the lights on and off when the ignition is on. If I leave the switch on indefinitely, the lights simply turn on 15 seconds after I turn on the ignition and turn off when I turn off the ignition. A review of that switch can be found here Output shuts off immediately when ignition is shut off regardless of handlebar switch position. If I use the kill switch rather than the ignition to shut down the bike the lights stay on if the switch is on. Output 3 - Coil of slave ABS Disable Relay - See detailed article on this topic here Ignition Trigger. 15 second startup delay limited at 2 amps. I am using a handlebar mounted switch to provide a ground to one side of an ABS disable relay’s coil. The PDM 60 provides the 12VDC to the other side of the coil. Yes, I could have used the PDM 60 to control the ABS disable without a relay, but as I needed to switch a 30 Amp circuit I chose to use a slave relay. A review of the handlebar mounted switch can be found here Output shuts off immediately when ignition is shut off. If I use the kill switch rather than the ignition to shut down, the ABS disconnect relay remains active. If I leave the ABS disable switch on indefinitely the ABS automatically disables 15 seconds after ignition on. I went with a 15 second startup delay to allow the ECU to complete it’s startup, and for bike startup. 15 seconds after the ignition is switched on all outputs turn on except those selected for ignition & ground trigger, and those selected as inactive. WARNING: There is a blurb in the manual that I almost missed. DO NOT attempt to program your PDM 60 while its 12VDC input is connected. According to the manual this can damage the unit. I had mine completely wired up, went to program, and was glad I read ahead or I may have killed the PDM 60. WARNING: Pay special attention to how you plug in the programming cable. It will plug in in two different directions. One direction programs the PDM 60, the other direction destroys the PDM 60. There is a warning to this effect in the manual as well, but take your time making sure you orient the programming lead correctly. NOTE: As per the programming manual you will need Microsoft’s .NET framework version 4 installed on the programming laptop/pc. The programmer installation file installs the USB drivers you’ll need for the programming cable. Once installed the programmer is very easy to use. Yamaha Super Tenere Specific: On the Yamaha Super Tenere the easiest and cleanest place to get your ground reference and ignition trigger is the stock aux lighting wire harness which is likely unused on your bike. This wiring harness is located under the lower right cover near the stock toolkit location. Connectors and rubber seals for this plug can be sourced from your friendly Yamaha dealer and cost less than a dollar if not free. There are two plugs/harnesses stashed just to the left of the stock toolkit location. One is triangular and has three connections that don’t go anywhere, and one is square and has four connections that don’t go anywhere. Take the male side of the, white, three connection plug down to your Yamaha dealer and ask for the connectors and rubber seals needed to complete the male side of this plug. (The four connector plug is for Yamaha accessory grip heaters). You can find a detailed writeup on how to utilize this plug within my ABS Disable Switch Article about half way down I mounted my PDM 60 in the lower part of the electronics bay just behind the stock toolkit location. All my wiring and terminal strip is located in the stock toolkit’s location. I got rid of that useless piece of kit long ago, and created my own toolkit which I keep in my panniers. I made a mounting plate for the PDM 60 out of some 1/4” acrylic sheet (), bolted the PDM to the mounting plate, and used velcro to affix the PDM and mounting plate to the flat spot in the electronics bay. I used a 12 point terminal strip for all my connections to keep everything nice and tidy. For wire routing to the driving lights and GPS I went up under the upper right side cover, through an existing wiring chase, and to the lights/GPS wrapping everything in heat shrink tubing. Pictures speak 1,000 words - see pictures below for reference. Want to know what others think about this product or want to share your experience? Checkout our Reviews.
 -
Anyone else see this oxidation of their paralever arm? I saw this on Rich's bike and they said at the dealer it's a known issue. I just thought it was a copper color on purpose.
-
Hi, I am interested in getting back into BMW ownership. I found a nice looking, clean R1150GS with about 55k miles on it locally. It has handguards, heated grips and panniers (nothing fancy, black plastic) and looks to be in good shape. The price is right, but I haven't owned a Beemer in over 20 years and that was an early 80's model. What are some the primary concerns or things I should look at? I plan to ride it a lot, and would like some insight into the longevity of the beast. I will hit some minor trails, but I prefer the standard style riding position to the cruiser style. I do ride off road on dedicated machines, so this won't be my only ride.
-
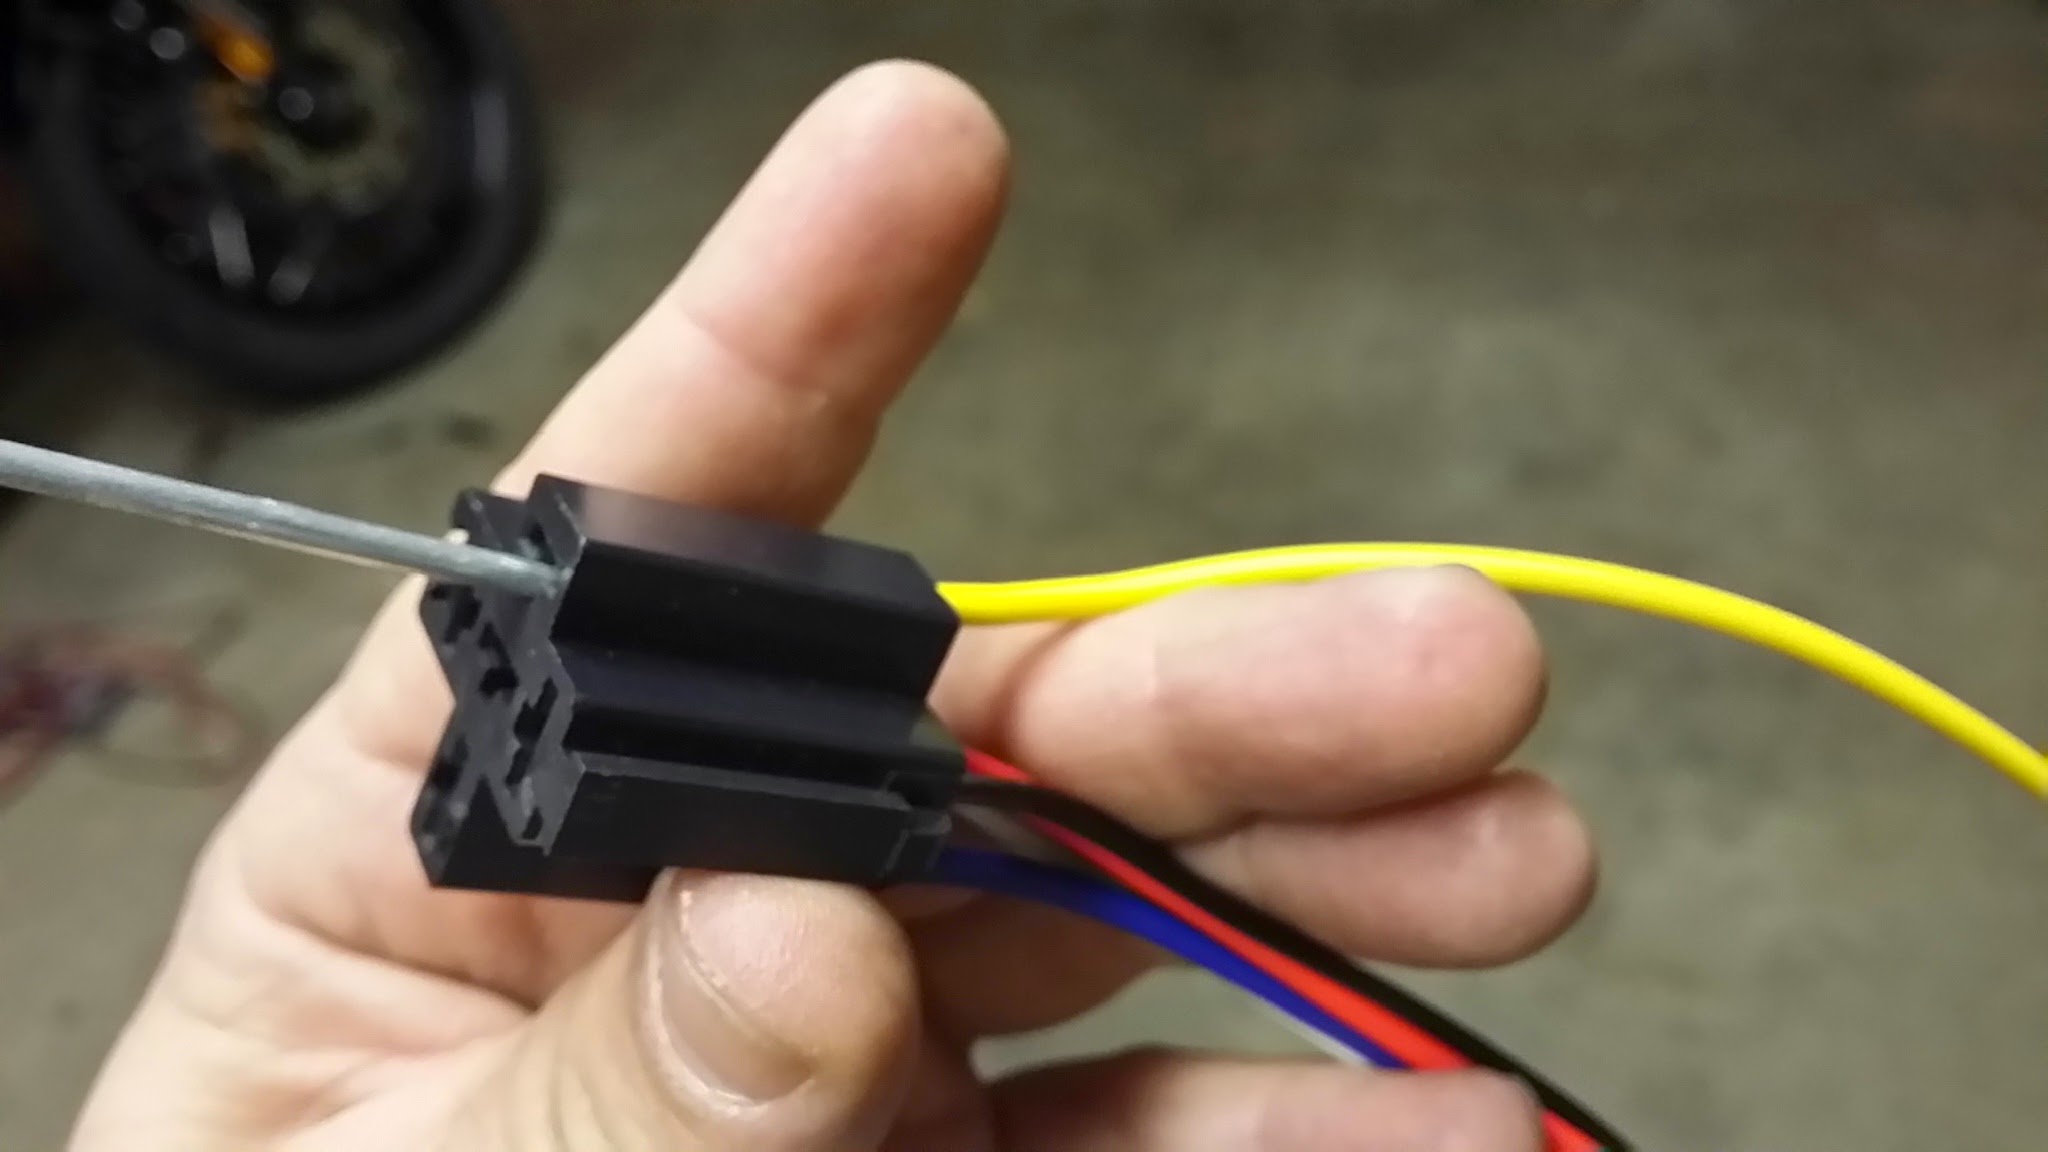 Disclaimer: You disable your ABS at your own risk. Damage to yourself, or your bike, resulting from this modification either during the modification process itself, or while riding with ABS disabled is solely your responsibility. Ok, now that that BS is behind us lets get to the modification. Lets get right down to it! It's really simple actually - the basic premise is that you want to be able to defeat the ABS when riding off-road or on loose surfaces to decrease your stopping distance, allow you to lock up the rear, etc., but we are not going to get into off-road riding techniques in this article. The simplest way to defeat the ABS is to simply pull the ABS Motor fuse, but that's a pain. You have to take off a body panel, remove the fuse, re-install the body panel, and then not lose the fuse. There is a safe way to accomplish this electronically however, without risk of damage to the bike's electronics. Here's what you'll need: A fused single pole double throw (SPDT) relay such as the one found here: http://www.autotoys.com/x/product.php?productid=18599#tabs . You don't have to use a fused relay as we are installing all our circuitry after the factory ABS motor fuse, but I’m anal and like to fuse my relay contacts. A relay socket for your relay like the one found here: http://www.autotoys.com/x/product.php?productid=320 which we will modify slightly. An on off switch of your choice. This can be handlebar mounted, chassis mounted, whatever. The main thing is it simply needs to be an on/off switch (not momentary) Three .250 12 AWG Female quick disconnects like those found here: http://www.autozone.com/ignition/electrical-wire-connector/dorman-quick-disconnect-terminal/296848_0_0/ One .250 12 AWG Male quick disconnect like the one found here: http://www.autozone.com/ignition/electrical-wire-connector/dorman-quick-disconnect-terminal/296897_0_0/ Some heat shrink tubing big enough to fit over the .250 connectors About four feet of 12 gauge stranded wire. Three pieces of 16 gauge stranded wire in 1 foot lengths in 3 colors (Red/Black/Yellow) One short bolt, locknut, and washers to mount the relay Connectors and rubber seals for the super-top-secret, unused, stock, auxiliary light plug located under the lower right cover near the stock toolkit location. These can be sourced from your friendly Yamaha dealer and cost less than a dollar if not free. There are two plugs stashed just to the left of the stock toolkit location. One is triangular and has three connections that don’t go anywhere, and one is square and has four connections that don’t go anywhere. Take the male side of the, white, three connection plug down to your Yamaha dealer and ask for the connectors and rubber seals needed to complete the male side of this plug. (The four connector plug is for Yamaha accessory grip heaters). Once you have your shopping list fulfilled let’s get all our materials ready. First we need to remove the insulation off the three .250 12 AWG female quick disconnects. Simply use a pair of needle nose pliers to twist, loosen, and pry the insulation off the stem. We don’t want any insulation on these connectors Cut two 3” pieces of heat shrink tubing large enough to fit over the 12 AWG Male quick disconnect Remove the wires and connectors 87, 87a, and 30 from your relay socket. Do this by inserting a small screwdriver into the hole near the connector (from the plug side), pushing in on the screwdriver while pulling the wire out from the rear Cut two pieces of your 12 gauge wire to about two feet each. Strip both ends of each wire back about 1/4 inch. Crimp or solder two of the .250 12 AWG female quick disconnects onto each end of one wire. Crimp or solder one of the .250 12 AWG female quick disconnects, and the one .250 12 AWG male quick disconnect onto the other two foot length of wire. NOTE: When attaching the wire onto the connectors make sure the end of the wire does not protrude past the sleeve of the connector as this will interfere with the locking mechanism inside the sockets later. Slide both 3” pieces of heat shrink over the wire with the male/female disconnects. Snap the female end of your female/male wire into the relay socket #87a (Normally Closed) from the rear. Snap one of the female ends of your female/female wire into the relay socket #30 (Common) from the rear. You will not be using terminal #87 (Normally Open) - leave this removed wire out of the socket. If this wire from terminal #87 is left in place 12VDC will be present on this lead when your ABS is disabled. Install the relay onto the relay socket. Sometimes the new female disconnects won’t snap into the socket properly. Don't worry too much about this - just hold the wires into the socket as your push the relay into the socket and ensure a full connection on all leads of the relay to socket. Strip both ends of your 1 foot lengths of 16 gauge wire back about 1/4 inch. Crimp or solder the small spades you got from your friendly Yamaha dealer onto one end of each of these wires. Insert them fully into the sockets in the plug from the rear paying special attention to match the colors with the colors in the female end of the socket on the bike (Yellow to stripe). You can grasp the connector ends inside the plug with a small needle nose pliers to help pull the spade connectors into the socket. We won’t be using the red wire, but make it anyway for future use and cap off the end. Slide the rubber seals over the wires and down into the holes in the plug after you have inserted the spades into the plug fully. It would also be a good idea to heat shrink the three wires together and make your own harness to clean it all up. Now you are done with prep - remove the lower right, plastic body cover from the motorcycle to expose the battery and motorcycle's wiring. (the picture shows the upper cover removed as well - this is not necessary) Disconnect your battery! You may think you can do the rest of this without doing so, but all it takes is one slip of a screwdriver, or one dropped wire in just the right place and you have blown fuses or worse. Save yourself the headache and Murphy’s law and just disconnect the battery. If you haven’t already done so, remove the factory Yamaha toolkit, throw it over your shoulder, and create your own to store in your luggage. The factory toolkit for just about any motorcycle is a bauble thrown in by the manufacturer to say it’s there, and is close to worthless. There are many articles on the topic of what you need in your own toolkit. We will be using the factory toolkit’s storage location for our relay location. if you insist on keeping the toolkit, there are other places under this cover you can place your relay - proceed as desired. Locate the white plastic connector between the two 30A fuses just above the battery, depress the release catch, and unplug the connector. The large, 12 gauge, red wire feeding into this connector is the 12VDC supply to the ABS motor. (see picture below) Using a pair of snips, carefully cut a slit back in the black insulation around this wiring harness a couple inches to give you room for future steps. Be very careful not to nick or cut the insulation of the wires in the harness. Examine the plug side of this connector. note the location of the connector for the 12 gauge wire. There is a plastic catch inside this plastic connector that locks the metal connector from being removed. If you insert a small, flat blade screwdriver into the plug side of the connector you want to release, and wiggle it around a bit you will release the catch and be able to remove the connector. There is really no way to take a picture of this, so you’ll have to experiment until you get the 12 gauge red wire and it’s connector removed. In the picture the white plug is still plugged in - yours won’t be. I was experimenting when I took this picture, so my plug was plugged in. Insert the female connector coming from #30 of your relay socket (Common) into the white plug that you just removed the connector from. Push the female connector into the socket until it snaps into place Insert the male connector coming from #87a of your relay socket (Normally Closed) into the female connector of the wire going to the ABS motor Slide one piece of heat shrink over this connection, heat to shrink, then slide the second piece of heat shrink over the first - heat to shrink. We want lots of protection here. Install your on/off switch of choice, and route the wires down to the area where you’ve chosen to house your relay. Plug your newly made 3 pin wiring harness into the factory auxiliary light harness. Again, make sure you plug this in correctly and match red to red, yellow to stripe, etc. If this plug is already used find another source of ignition switched 12VDC and ground for the next steps Connect one of the two leads coming from your on/off switch to #85 of your relay socket (Coil). Connect the other of the two leads coming from your on/off switch to the black wire (ground) coming from the factory auxiliary light harness you made. Connect the yellow wire from the factory auxiliary light harness (switched 12VDC) to #88 of your relay socket (Coil). If you chose to install your relay in the toolkit location, drill a small hole in the flange about midway up the rear portion of the toolkit’s cubby to mount the relay to. Run your Bolt, washers, and lock nut through the relay and hole to secure. Carefully stuff the wiring into the toolkit cavity and secure with your preferred method. You can use a zip tie or even use the factory rubber bungy that held the toolkit in. Re-stuff the factory hand grip and auxiliary light plugs into the cavity where you found them behind the factory toolkit location. That’s it - your done! Reconnect your battery and enjoy. The way this is wired you can safely leave your ABS switch in the closed position when you turn off and start the bike. there will be no parasitic draw from the relay's coil during power off as we used the switched 12VDC from the bike to the coil of the relay. As soon as you turn the bike on, and if your switch is closed, the ABS will disable. To re-enable the ABS you will have to open the switch, turn off the bike, and restart the bike. Enjoy!
 -
0 comments
The greatest Bike I've owned to date, Opened a world of back road fun !! -
0 comments
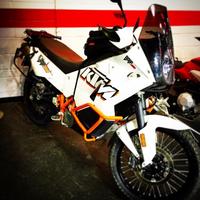
Loving my Super Tenere!-
- 1
-
-
- SuperTenere
- Yamaha
- (and 1 more)
-
0 comments
XOXOXOXOX -
-
2 comments
I've just bought this bike and the Pesky Canadian winter won't let me ride it so review to follow. -
0 comments
It is my first bike and A bike I will never part with for many reasons. Absolutely fantastic on the road even if a little choppy behind the small windshield. The sporty feel paired with a relatively upright seating position make for a bike that can be ridden with bravado from dusk till dawn and it has been. Marketed as being a versatile system Kawasaki said it would venture down those tempting gravel trails and that it did many times with great success. The tiny 17" front wheel can sap confidence in deep gravel but if anything as a new rider this thought me a lot about the workings of a motorcycle in such a situation. However the line is drawn there. Its a little delicate for single track or technical riding and the tall but road oriented suspension left me fearing for the the bike at times to the point that it shook a fan brush out of line on one ride and left me nursing the bike home without a working fan. A great bike, I really can't stress that enough but if your wanting to be aggressive off road it may not be the unit for you. -
February 3, 2015 – (Motor Sports Newswire) – KTM unleashes an Adventure range stronger than ever with the arrival of the KTM 1290 SUPER ADVENTURE and KTM 1050 ADVENTURE to bolster the dynamic and newly refined KTM 1190 ADVENTURE and 1190 ADVENTURE R for 2015. Four-strong Adventure range KTM 1290 SUPER ADVENTURE & KTM 1050 ADVENTURE join successful KTM 1190 ADVENTURE models Available at KTM dealers from February www.ktmadventure.com – dedicated microsite launched KTM ADVENTURE Microsite provides detailed information on the four strong Adventure range With over a decade of experience and development, the current Adventure range deploys some of the most sophisticated automotive technology combined with KTM’s ‘READY TO RACE’ philosophy to make these bikes more dynamic, safer and exciting than ever. KTM ADVENTURE FAMILY 2015 The KTM 1290 SUPER ADVENTURE lives up to its name by redefining the standard for luxury touring on a motorcycle. Boasting features including 160hp, 140Nm, semi-active suspension, cornering lights, cruise control, optional hill hold control, KTM powers into its new segment with a bike that embodies superlative technology in every respect as far as its power, comfort and equipment goes – but of course with an explicitly dynamic touch. KTM 1290 SUPER ADVENTURE: equipped with superlative technology it is the new benchmark for luxury touring The KTM 1050 ADVENTURE employs neither excessive power nor equipment for those who demand a travel enduro that delivers pure riding enjoyment in comfort over long distances but with a chassis that can exploit the twisty routes or simply out manoeuvre traffic when escaping. With its V-twin engine beginning its life from the KTM 1190 ADVENTURE, the reduction in capacity comes without a decrease in fun – matching its bigger brother for power and torque up to its 95hp. For riders on an A2 licence, the 1050 can be restricted to meet these requirements. KTM 1050 ADVENTURE – enter the champions league For such a dedicated range of bikes, KTM has launched a devoted microsite to these machines - www.ktmadventure.com. This is where riders can find out further details on the line-up, comparing the models to work out which Adventure is for them. The huge array of PowerParts enhancements and personalization for these bikes can be investigated and riders can also share photos of their own adventures to help inspire others. Once the new 1050 and 1290 are launched to the world’s media in Gran Canaria for dynamic testing and evaluation in late January and early February, these exciting machines will then become available at the KTM dealer network. www.ktm.com
-
From the KTM Corporation Blog: KTM’s Marc Coma took an incredible fifth victory at the 2015 edition of the Dakar rally and it was also the orange manufacturer’s 14th consecutive win at the race credited with being one of the toughest in the world. Almost two weeks after the event and Coma is jubilant, but visibly tired after numerous interviews and celebrations as he returned to his home place in Avià, Spain. We caught up with the Dakar-man to talk about the feat he conquered this year and his reflection on the race after returning home. Talking about his overall feeling of the race Coma explained that while it was of course difficult, it’s a credit to the preparation and the work from the team to reach this result again. “Of course the feeling is super and I’m very happy. We worked very hard with all of the team together; everyone knew what they had to do at each moment, and when it’s a tough race like Dakar you need that. The preparation is important for the arrival at the end. From the mechanical side it was fantastic, but also physically I felt good and my riding level was okay. It was a hard race like always, and the competition was close, but in the end we could handle it.” Planning is a key part of the Dakar, and while most teams have a plan from the beginning, Coma was forced to re-think his strategy after a moose issue in the back wheel on day two. He lost 12 minutes to the leaders, and had to push a lot more than he would normally, but his consistency once again paid off. The marathon stages were also where his competitors lost valuable time, so the Spaniard explained that while it was as tough as ever, the strategy for the marathon stages continued to be the same and it paid off. “To handle the marathon stages is key for the Dakar, particularly in the second part of the rally. It’s okay to go fast, but in these stages you have to be careful and not just go full gas. You have to manage the tyres and everything to make sure you can get to the end. It’s a real balance.” In comparison to other Dakar’s the most talked about stages were day two, and the salt flats, which haven’t been included in the route previously. Both of those days were at the extreme, and saw a lot of riders forced to retire, although Coma says the spectacle of the salt flats was also a highlight and reaching the end of this stage was almost like a victory. “To compare each Dakar is difficult. Of course the conditions we found in the salt flats were terrible. With the salt, water, cold and this stuff getting into the engines was really tough and a bit different compared to the other races. From a highlight point of view the picture from this Dakar is the salt flats, and the pictures we have from Bolivia are the feeling to remember from the Dakar in 2015, although for me it was on the limit for us.” “To be all together in the white skyline, all lined up was something interesting, but to get to the end of this stage was just like a survival. It was a big victory; it was very hard for the engine, and to understand what was going on, whether it was too hot because of the mixture off the flats on the bike, or whether to go fast, or how to manage the situation; it was not an easy thing to find the limit.” The final day of the rally was red flagged due to the horrendous muddy conditions the riders found themselves in. Coma of course was first to reach the red flag as victor of the race. A fifth victory is a massive achievement, and spanning over a long period when the race has changed so considerably; different continents, different engine capacities and changes in the competition. “The conditions on the final day were very hard. The tyres we have are for the desert, we have heavy bikes and the conditions were dangerous. I was really focused to find a good rhythm, because in those conditions it’s easy to fall, and when I saw the red flag I was like ‘wow’ now it’s finished.” “Every year is difficult, and the race is close. The other teams are pushing hard, but we are still at the top. It’s also the first time I’ve won two consecutive Dakars, which is great. My first victory was in 2006, which was a long time ago, when the race was in a different continent, with a completely different bike, and it’s positive that we can survive all of these changes. This gives me a good feeling and makes this win even more special. If you look at the picture from that time to now it’s completely different.” “We always knew Paolo and Joan would be strong competitors, and their level from the world championship, so I expected them to be close all the way through. It was not a surprise for me, but the result is something we are proud of.” It’s a team affair though and while Jordi Viladoms was runner-up last year, he helped Marc once again until he was forced to retire on that notorious salt flat stage. Marc explained how important the teammates are in the Dakar. “Jordi really helped me a lot in the first marathon stage, and right through the race until he had to stop. He was a big help for me and then also Ruben (Faria) was helping me a lot when he was close to me. But it’s also true that some days I was alone in front of all the Honda team. In the end we are on the bike, and it’s important that the race was still played fairly. Nobody made crazy things, or did stupid things like making dust, so from a sporting side I think this is important, because this is the spirit of the Dakar.” A clip of Marc has been shown virally around the internet on social networking of Marc stopping to take a ‘selfie’ with a fan, which may surprise some people, as he’s racing! But Marc is truly a man who takes care of the fans and he explained what happened. “Yes. It was a surprise because I didn’t think anyone was filming it! I saw one paper with my name at the side of the road and it was in the liaison and not under pressure. Of course in the stage I cannot stop like that, but in the transfer I had some time and it was nice for the fans!” https://www.youtube.com/watch?x-yt-cl=85114404&v=-shmNqVR_qM&x-yt-ts=1422579428 For the rest of the KTM team there were celebrations and disappointments for the riders. Britain´s Sam Sunderland went out early after winning a stage, Matthias Walkner from Austria won a stage in his rookie year and was a top-ten rider until he retired with altitude sickness, while Australian Toby Price took a podium at his first attempt. Marc is pivotal in helping the next generation of riders for KTM, as he trains and rides with them leading into the Dakar race, and he explained how he feels the young riders have a lot of potential for the future. “Dakar is like that. You make a mistake like that and you pay for one year. It’s a pity because Sam has a big potential, but in the end he made a mistake and he paid a high price for that. He’s young though, and he will have a lot more Dakar races in front of him. He doesn’t need to add pressure because of that and in the end the only point we can make is he still has some learning to do.” “I also have so much respect for Toby. To get on the podium in the first year as a rookie, wow, big respect. You can understand a little bit the potential he has; the first time in the race and he’s on the podium, plus he’s very consistent. With Matthias he started very hard and pushing a lot, so he got some good results, but in the end he paid for that also. His energy was going down and I think he got a big picture to understand the race, plus how to make a better preparation for next year. With the results he did get I think we can see his potential. I think we have to be quietly confident that there’s a good future in the KTM team.” KTM is proud of its achievement in rally, which remains at the very heart of the company from the days that Heinz Kinigadner raced in the 90’s. Marc is quick to point out how important it is to have a good team, as they also have a lot of work with little sleep. “Of course a big part of this victory is the work from the team, especially when you see how the bike arrived at the end of the stage. Particularly with the salt flats, the bike was rebuilt 100% completely. They changed all the pieces they can change with the rules so we didn’t get a penalty. To go to sleep and see only the frame there, and you can say wow this is our team and they are working hard.” “14 victories is amazing. KTM has to be very proud, as it’s a lot of work. From the start the spirit that the rally department has created with Hans Trunkenpolz all those years ago is still alive with Stefan (Huber) and all the guys working on the project. It’s this motivation that is really important.” After returning from the race Marc has been busy with the media and all of the requests to congratulate his good work. He’s looking forward to planning for the year, visiting the KTM headquarters in Mattighofen, Austria followed by a well-earned break. “It was a busy week after Dakar. After taking the victory it is nice to come home, but there’s always a lot of things to do here in Spain with visits, the journalists, and I’m still doing that, but I hope at some point next week I can take a break to clear my head and to recover the energy. With the body I’m feeling better and better. I can sleep and I feel better than last week, but from the mental side I need a break. Every day talking about the same things, and I have to make a complete break to process what’s happened.” “The plan is to go to Mattighofen to visit all the KTM people that were not in the Dakar, and to have some meetings to make a plan for the development side for the year. I also have to prepare the season and everything, so this is the main point before I’ll take some holidays. Then it all starts again!” https://www.youtube.com/watch?x-yt-cl=85114404&v=dwSCS0LOxH4&x-yt-ts=1422579428 Photos: Marc Coma | www.ktmimages.com
-
From the KTM Corporate blog: What lies behind the semi-active suspension from WP. As the flagship of the range, the new 1290 SUPER ADVENTURE meets all requirements for luxury and travelling comfort. Modern electronic rider aids help to improve riding pleasure and safety, thanks to MSC (motorcycle stability control) with cornering ABS and lean-sensitive traction control. The buzz is provided by a cultivated 160 hp of peak power and divine acceleration throughout a wide rev range. Sebastian Sekira, Head of the Street department in KTM Development, adds: “This engine is a dream for everyone who enjoys pulling out all the stops or just travelling along lazily with next to no gear changes. Even climbing Alpine passes in fourth gear couldn’t be simpler or smoother.” One special innovation in the extensive equipment is the semi-active chassis from WP. This makes the fine tuning of fork and shock absorber particularly easy, as the rider can choose between “Comfort”, “Street”, “Sport” or “Offroad” settings on the handlebar. An electronic controller on the semi-active chassis ensures that the suspension is adapted to riding style and road surface while on the move. The necessary information for this is supplied by suspension travel sensors on fork and shock absorber plus accelerometers at the front and rear. Tuning is based on characteristic maps stored in the system. The suspension reacts constantly in real time to unevenness or potholes in the road (or offroad track), subject to setting selection and speed. Suspension components use the integrated sensors to measure the speed of spring compression and the compression travel. The higher the value in each case, the harder the suspension reacts. The control unit regulates the damping of USD fork and shock absorber by opening and closing the hydraulic bores. The semi-active suspension on the 1290 SUPER ADVENTURE has the greatest effect in comfort mode, because the basic setup is soft and the valves only close purposefully for harder, tauter damping when the road surface is really rough. The sportier the selected setting, the tauter the basic shock absorber setup, because the flow through the valves is reduced correspondingly. Sebastian Sekira on the semi-active suspension: “This technology opens up new dimensions for riders. As with the riding modes, the chassis of the motorcycle can also be adapted to both personal taste and the respective situation, depending on whether you want to be travelling comfortably, normally, sportily or in an offroad manner. Especially in comfort mode, the semi-active suspension makes it feel as if you’re floating, but with very good road contact. You’re not decoupled, there’s always plenty of feedback and you’re completely safe. Even when vicious potholes or sudden unevenness crop up, the motorcycle remains dynamically stable.” One positive side-effect is that the semi-active suspension provides a slight anti-dive when decelerating. Sekira: “We utilise that of course. Since this in turn allows more efficient ABS tuning, which helps to reduce the braking distance when it really matters. In addition, the pitch compensation reacts to the load. The sensors adjust damping accordingly. This means fewer pitching movements while riding two-up when accelerating and braking, with hardly any detriment to ride dynamics. Consequently, riding pillion is also more comfortable for the passenger.” Photos: Buenos Dias | H. Mitterbauer | R. Schedl
-
1 comment
Great bike. Suspension needs some work. I also plan to add larger tanks for travel. -
-
1 comment
This is a great bike. Fun to ride on and off road. -
Scotty Breauxman writes for Adventure Motorcycle Magazine as well as promotes an event called Baja Rally. I first met Scotty at AltRider's Taste of Dakar in 2013 and have since run into him again in Baja as well as the last Taste of Dakar in Mar of this past year. http://www.adventuremotorcycle.com/reviews/24-reviews/bikes/699-bikes-project-2014-bmwf800gs-urm#.VK71jSvF_To He had this BMW F800 GS put together and billed it as "The Ultimate Adventure Riding Machine" with some help from BMW Motorcycles of Escondido, AltRider, Konflict Suspension, Woody's Wheels, etc... When I saw him at the TOD event earlier this year he said he'd just picked the bike up the day before and was excited to ride it. He said with the suspension, damper and Flexx bars that he called his "butter bike." There's many interesting comments on that page like how it's still way too heavy, too expensive, etc... At some point I'd like to do something similar, like an XLADV project bike. We're obviously don't (yet) have the reach of an ADVMoto to attract sponsors like that but I'm sure it won't be too long
-
0 comments
Currently I have two ponies I keep in my stable " garage" 2008: F650GS Dakar & 2013 F800 GS. I traveled most of the South East Coast all last year totaling a good 28,000mls mostly solo on the F650.I wanted a larger engine and have recently (Mid December) purchased the F800gs For a RTW/West coast exploration. I'm still getting comfortable with the 800's weight (especially packed with camping gear). I have had the honor of training and riding with some of XLADV riders. I believe we are headed to Lake Berryessa this weekend. I feel this is a great start to another awesome big bike community!